Showing posts with label Sewing. Show all posts

I love you(r DNA) quilt

Last night I taught a great group of ladies this quilt. I just updated the info. I will post new photos later today.

I just finished my second instructable for the great quilt I designed this weekend.


Going to the Birds

Felt Bird Experiment


Okay I am moving on, this holiday season feels pretty over, at least from a making standpoint. I need to think about spring and what is better than birds and birdhouses. So to that end, I started searching for patterns of plush birds I could fiddle with and make my very own. I found a lot of patterns for flat birds (no gussets) and some folks who are making 3 -D birds and the Spool bird pattern.

So I just started with a traditional shaped bird, slopey back and tummy added a gut gusset and a head gusset. Kinda liked them, my cat LOVED them, which is why they are covered in hair and other gunk. I thought they needed a tail. I added a tail to the last one and called it finished, I can't find that one, thanks kitty. They felt more like ornaments for the tree, I think I was still in Christmas mode.

So I made one of the Spool birds and it is too fat, too big and too puffy. I like the one back seam and how the tail was part of the body but ...

Let's modify! I put the pattern on a diet and reduced the overall size, then I significantly changed the tummy gusset and the tail, much sleeker. I added a head gusset but it looked wrong I kept changing the shape of it, still wrong. Finally, hubby suggested I make the head seam "correctly" or on the inside and let the other seams show. I knew I married him for a reason, he makes the hard choices. The inside head gusset made it look like a bird head instead of a bird with a hat on. On the last one I added some legs, that are seriously weird and I need to work on them.

Felt Bird Experiment


Still not sure if this will get past the prototype stage but if you have been looking for some bird tutorial here are a few I looked at:

Here is a very cute mobile and tutorial using the Spool pattern made by Jen at House of Wood.

Retro Mama has an adorable Partridge pattern, just right if you need to make yourself crazy before Saturday.

Here is a cute Robin pattern from Bird's Party

A "Very" Cool Quilt

One of our customers just emailed me some great pictures of a quilt she made using Eric Carle's Very Hungry Caterpillar fabric. There are now three lines out by the amazing children's author.
I bought the fabric from you earlier this year and firstly made a cot quilt for a baby grandson. Then I made this larger single bed quilt for 2 year old William. Just wanted to say thanks - the fabric is great quality and easy to sew with. The colour are bright and very effective together.
Although I also bought some of your panels, I decided to make the pictures in this quilt with applique. The appliques are mostly from the Hungry Caterpillar fabric, too. i'll do some with the panels next!
Hungry Catapillar Quilt from Customer

Alison, Thanks for sharing! I love the applique.
Enhanced by Zemanta

Izzy and Ivy come to play

Have you heard of the cool children's clothing designer Izzy & Ivy? Well they are one of my new favorites. Their patterns are easy to make, and the go up to size 14, which means I can make an outfit for little bit in size 6 and her big sis in size 14.

We have a bunch of her patterns in stock and we are working on samples of many of them. I will post pictures as soon as they are done.

Avery Olivia Dress

is all about sweet shirring, and girly ruffles.
The middle ruffle is pieced so that you can include all of your favorite fabrics.
This is an easy to sew dress that any girl would love.


 Beverly Bell Top

This was one of our most popular patterns this past week at Knoxville and I am working on a sample right now.

This is a fun Babydoll top....with a twist!
The stripes swirl around the skirt of the shirt.
Jack n Jill Hat

So sweet and can be made for a little boy very easily, our sample is made with the Be a Man fabric. Sized up to a 22 inch head, so can be made for most adults.
Macy Giggles Dress

Easy and breezy as a bright spring day. As refreshing as a child's giggle.
This sundress is cute enough for a party, and comfortable enough for play.You'll love how fast this dress comes together.Make it with or without pockets, and with a thin or wide band on the skirt.

We are also working on a sample of this one. Can't wait to show off the cutie pies in my life wearing clothes made from these adorable patterns.

If you life the Castle Peep fabric from Lizzy House, so does Izzy & Ivy her most recent blog post shows off a redone bedroom for her little one.

Kokeshi Make & Take from Melly

Late yesterday I received an email from a customer that put a huge grin on my face.

Hello ladies!

I stopped by your booth at the AQS show in Knoxville and picked up your embroidery special - 2 DMC thread colors and a hoop, then you get the linen with the pattern stamped on it.  so cute!  Of course I'm addicted to embroidery now! Finished that cute doll pattern, and have downloaded several more :)  My question for you is:  I loved the linen that your free pattern was printed/stamped on.  What is it called?  And do you stock it in your store?  And do you stock any more embroidery patterns?

Thanks ladies - for introducing me to hand embroidery!  What fun fun fun!


A "Very" Simple Quilt

Next month my nephew will celebrate his second birthday. Jacob will move from babydom to childhood and he needs a new quilt to go with his new status.


So what other fabrics to use than the wonderful designs of Eric Carle. There are now three fabric lines from Andover Fabrics showcasing this talented artist & children's author. I used fabric from all three to create this "very" simple quilt. This quilt & a kit with all of the precut fabric will be in at our booth in Knoxville next month. When I break down the show the "very" simple quilt & corresponding books will be on it way West to my delightful nephew. I hope he drags it through the dusty roads of his childhood and loves it dearly.


Eric Carle's newest line is called the Very Series and it has images from:

The Very Busy Spider
The Very Lonely Firefly, 1995

Featured in the panel:
The Very Hungry Caterpillar, 1969
The Very Clumsy Click Beetle, 1999 
The Very Quiet Cricket, 1990


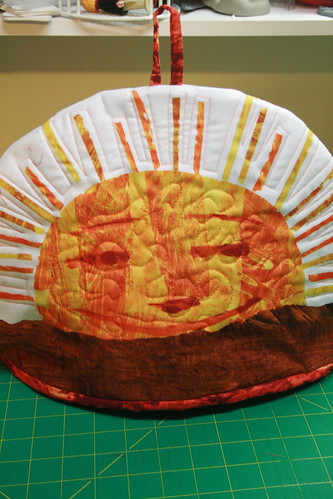
A Very Sunny Tea Cozy Tutorial

When I saw the NEW Hungry Caterpillar panel from Eric Carle & Andover, I knew I wanted to make my mom something with it.
Not actually with the caterpillar part, with the sun. Every time I look at it I hear the song, You are my Sunshine, which my mom used to sing to me when I was a child.

My mom loves hot tea and she needed a newr tea cozy, so here it goes.
Supplies:
One New Very Hungry Caterpillar Panel
1/2 yard of Cotton Batting or Pellon Thermolan
1/2 yard of lining fabric
Basic machine sewing supplies.


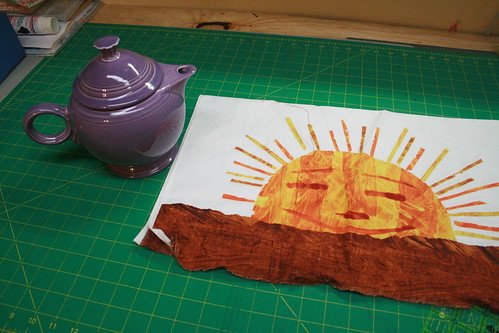
I cut the panel in half and measures my Fiesta tea pot, mom's teapot is a bit bigger,


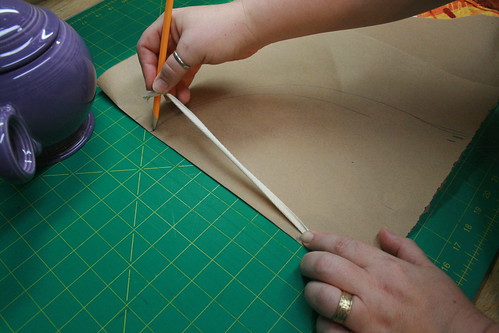
I folded a large piece of brown paper in half to make the pattern.
To make the half circle I made a compass with a piece of twill and a pencil.
My pattern is approx. 16 x 10. It may be a bit large for most tea pots but I did not want to cut off too many for the sun rays.


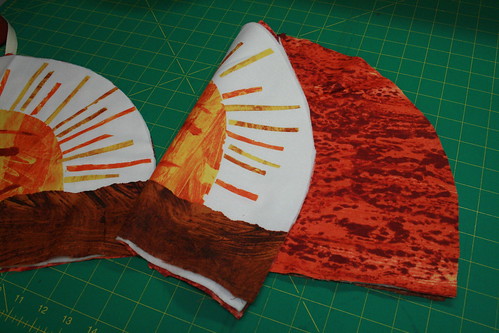
Use the pattern to cut 2 each of liner, batting or Thermolan, and the front Sun panel.

Make a fabric sandwich.
Lay liner WS up then the batting or Thermolan, then the sunshine RS up.
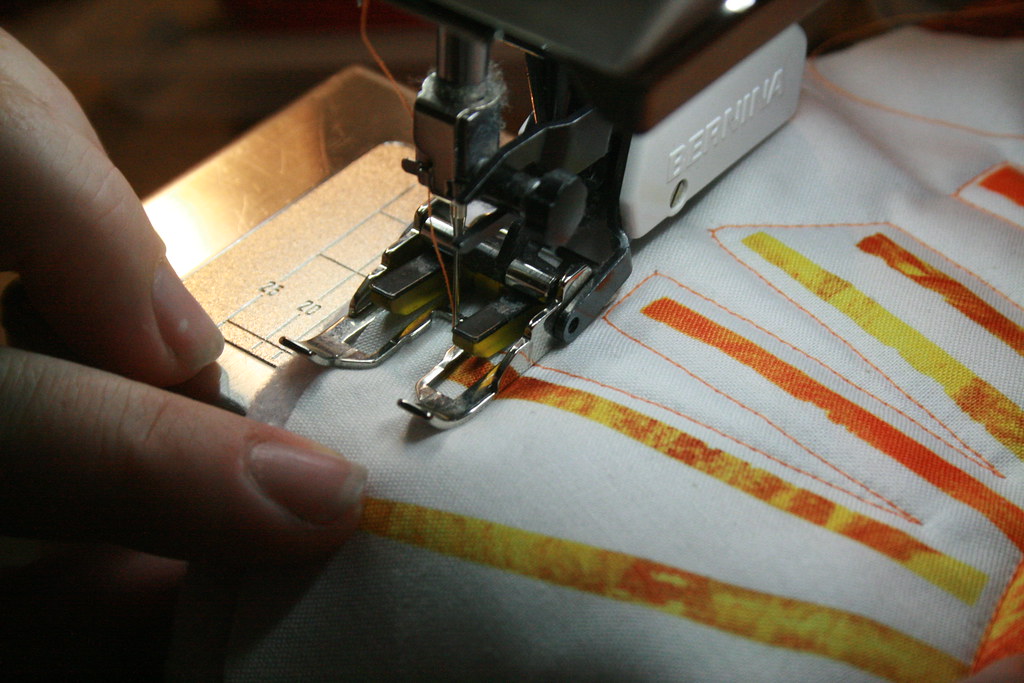
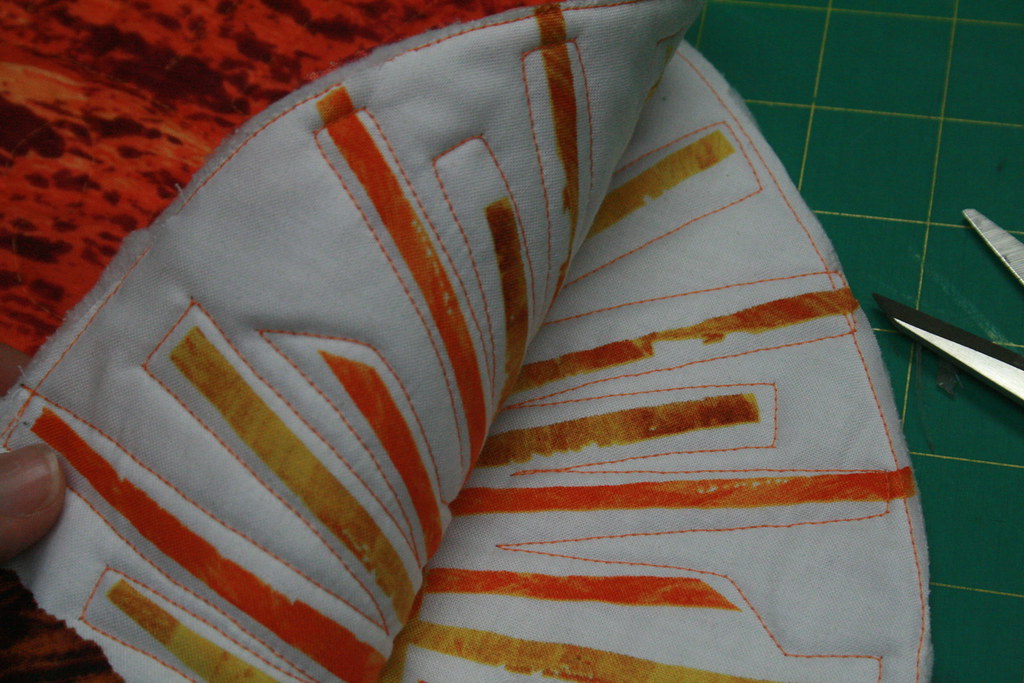
Use your walking foot and or your free motion foot to quilt the three layers together. I used a combo of free motion quilting and straight line quilting. Sew around the outside edges.
The quilting is decorative so go wild. I outlined the sun rays and then did free motion inside the sun face.
For the small loop at the top.
Cut 2  x 6 inches of the liner fabric.
Fold in half WST
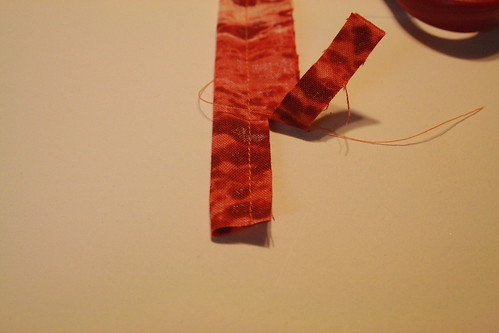
Sew 1/4 inch away from the fold.
Trim excess seam allowance down to 1/8 inch.

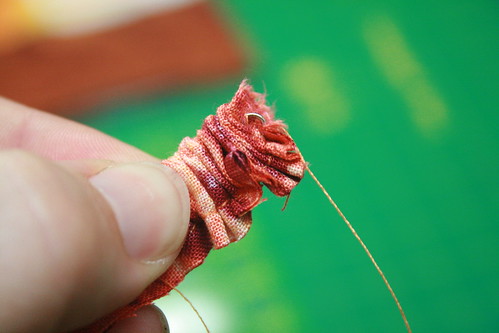
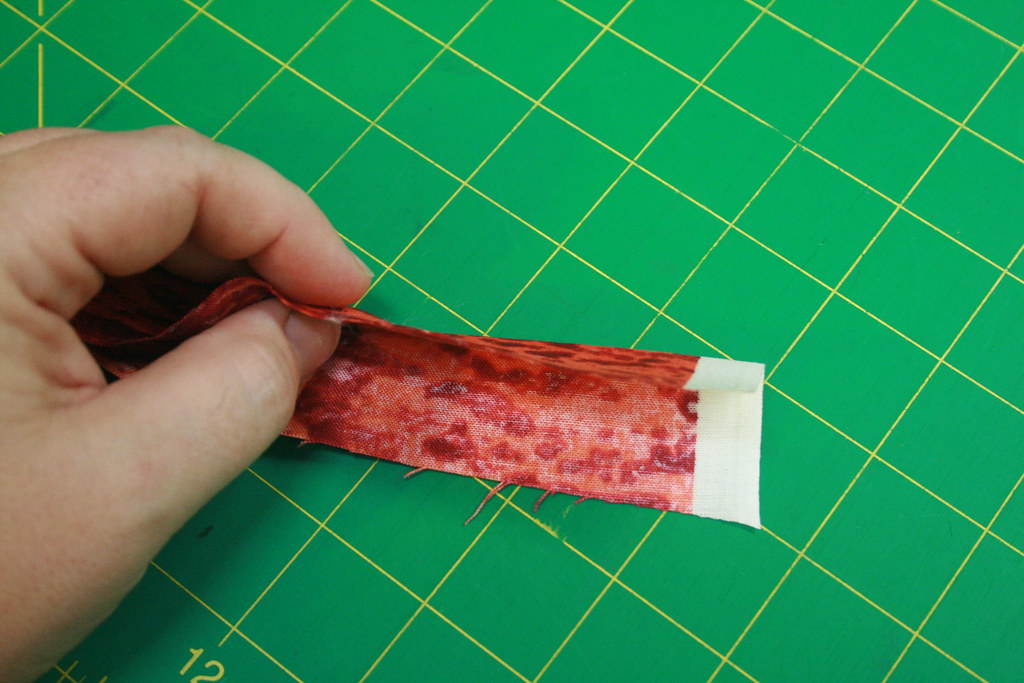
Use a safety pin to turn.
Trim to the stitch line.
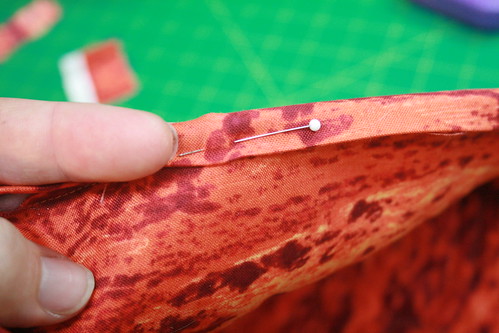
Pin the skinny strap to the center top.
Baste in place.
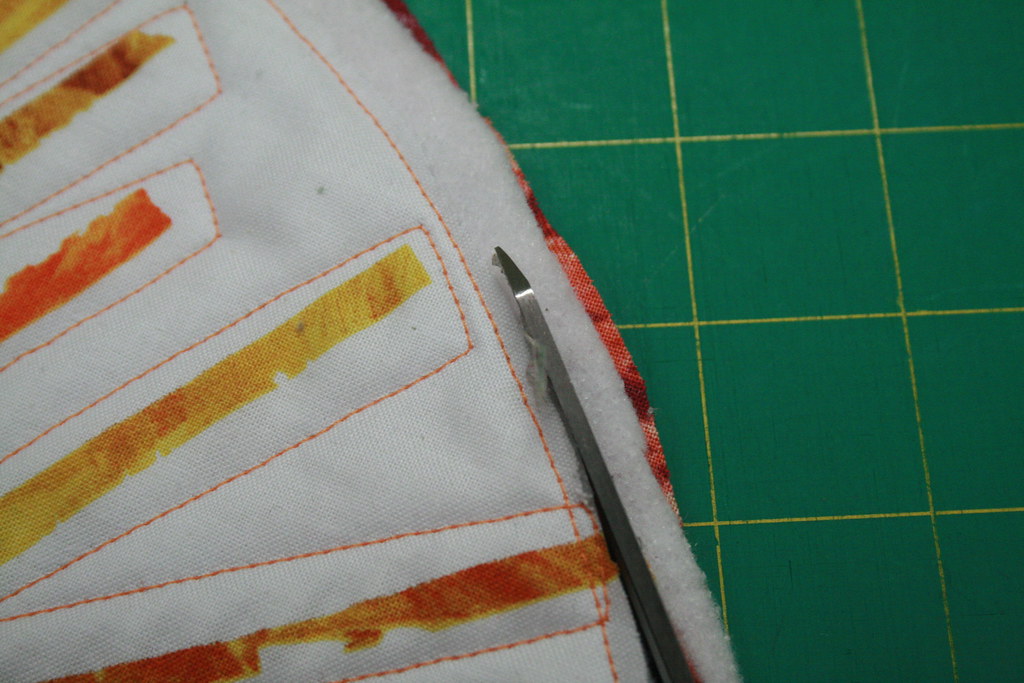
Put the Sun sides together. Line up the ground. Sew 1/2 inch seam on the curved top.
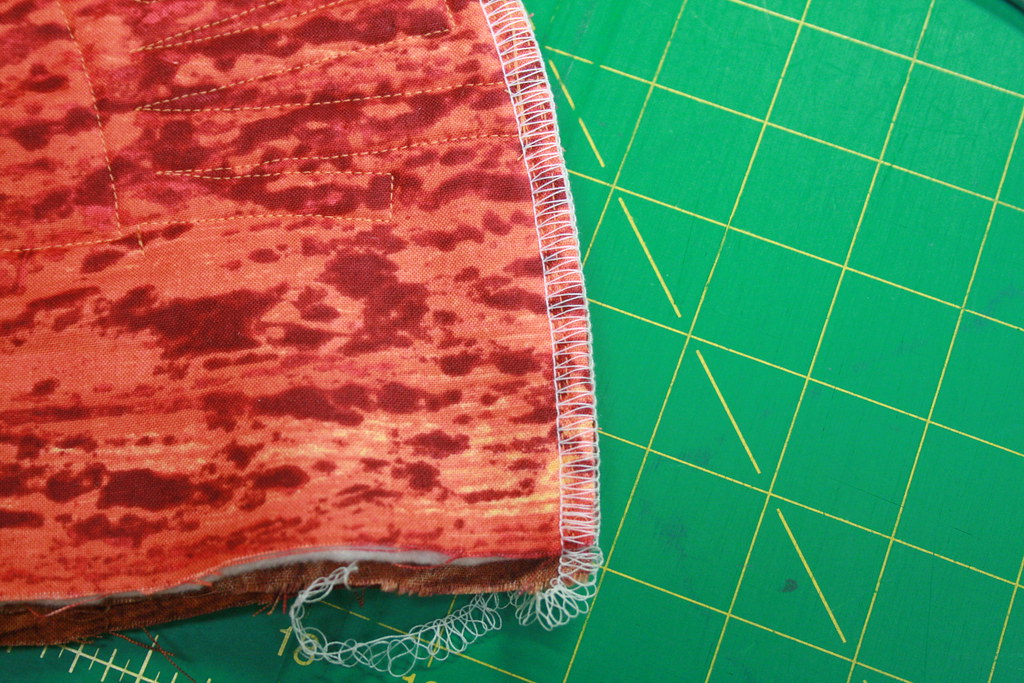
Finish the inside seam.
Cut a strip 2.25 x WOF of the liner fabric.
Fold in half.
Iron
Sew the raw edge of the strip to the bottom  raw edge of the Sun side of the cozy 1/4 inch SA.
This is just like binding a quilt.
 Fold the strip over the raw edge and hand sew it down inside the cozy.

Turn it Sun side out and pop it on your favorite teapot.

Flower Book Belt


More fun with the fabric flowers. Here is the tutorial on how to make the flowers.

Supplies
Finished Fabric Flower
2 D rings
Black Felt circle 2 inches
Grosgrain Ribbon in a size that fit your D rinds
Super Thick Tacky Glue
Measure around your book with your ribbon add a few inches to be safe, you can cut it down later.
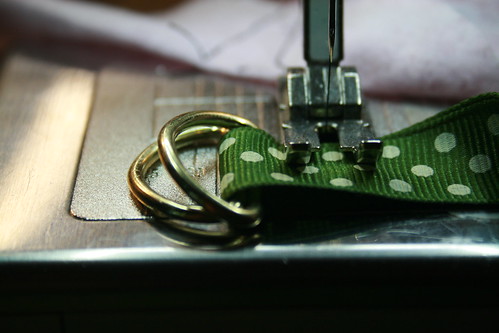
Slide the 2 D rings onto the end of the ribbon.
Fold over at approximately an inch.
Stitch Down the ribbon.
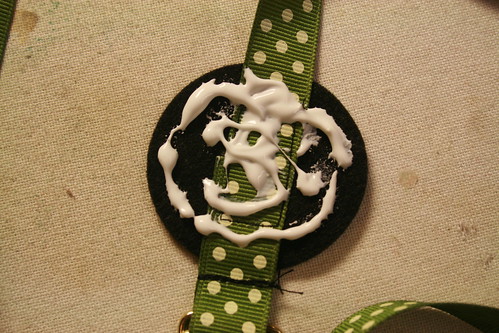
Sew the 2 inch Felt circle to the ribbon WST.
Smear on some Super Thick Tacky Glue.
Press the gluey felt circle to the existing felt circle on the finished back of your flower. Let it dry.
A Book Belt!
Look good at the pool with your very fashionably attired book!


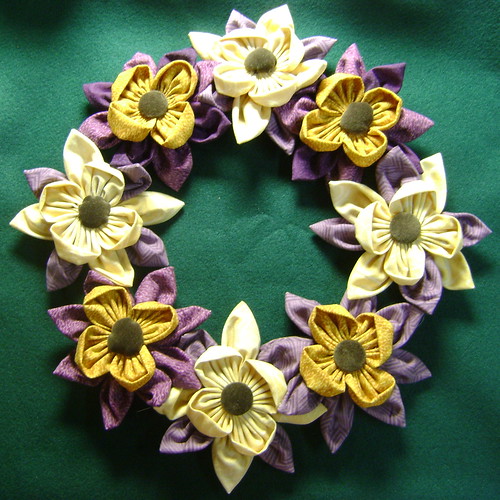
Fabric Flower Wreath

So I made some (like 12) fabric flowers. I love my MIL, she is not going to wear one much less 12. So onto the making of a wreath.

I had a wire wreath in my stash.

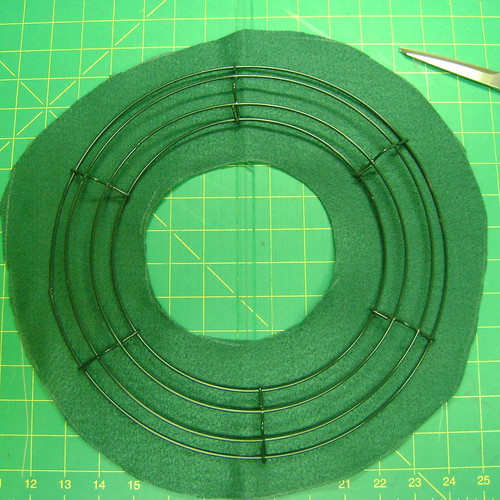
I placed it on some green felt and marked around the wreath about an inch away from the edge.
Then I cut out the felt.
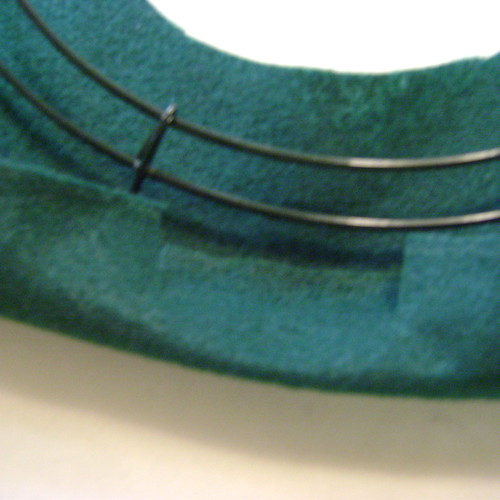
I snipped ease into the outside and inside curves to make it easier to glue.

Use a hot glue gun to attach felt to the wire.
Start on one exterior side, then attach a flange on the opposite side, then to the top, then to the bottom.
This should help keep it wompus instead of caddy wompus.
Looks pretty good if you don't check the back.
Evenly distribute your fabric flowers ( I only used 8) and hot glue them down to the felt. I am pretty in love with this I need to make a few in my favorite colors.
The tutorial for the flowers is here.

Fabric Flowers For Mother's Day

What to do? What to make for the super mom in your life? I am not fond of dead flowers, more commonly known as cut flowers. It bothers me that they are chopped off at their prime and stuck in sugar water for my personal enjoyment. If you want to give me vegetation it should have some roots. So to that end, every year I purchase my mom & myself a new (old) antique rose. I usually visit our local nursey Hastings. If you are in the Metro Atlanta area and have never visited, it is a treat, my kids love it: turtles, fish, parrots and sometime even bunnies along with many hard to find plants. The antique roses are amazing and they thrive with no spraying or extra work. They make me smile for months instead of days. This year after they bloom I am going to try making some rose cutting and see if I can make more of my antiques roses to share.  I have successfully rooted only one rose and it was an important one. I took the cutting from the roadside of 515 near Blue Ridge during one of the many round trips I make 3 years ago during my mom's chemo. This rose has not bloomed yet but it has buds this years and I will share as soon as I have pictures.

Wow, What was this post supposed to be about? Fabric Flowers! Let me get back on topic!

So since I don't give cut flowers and fabric flowers last forever here is how to make some.

Pick out your favorite (or their favorite) colors. My MIL loves lavender / purple. Cut out some circles.
For each flower you will need
4 large (5.5 inches) 
4 medium (4 inches) circles,
1 small (2 inches) circle Brown or Yellow Fabric,
1 small (2 inches) circle Green Felt.
Thread, Glue and a Pin back.
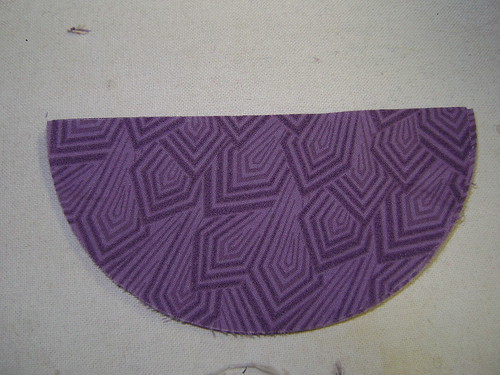
Cut the large (5.5 inch) circles in half. Making 8 half circles.

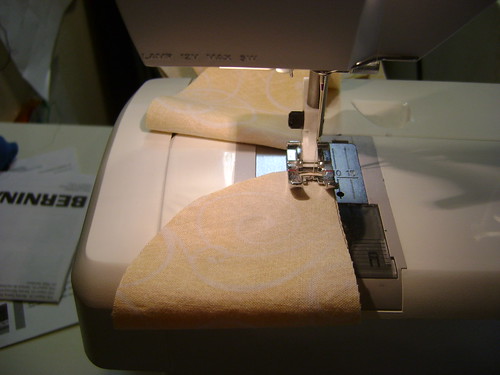
Fold the half circles into quarter circles RST and stitch down the straight edge (1/8 inch seam allowance). Snip apart.

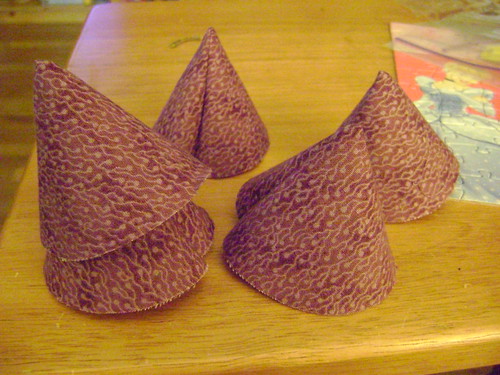
 Flip right sides out and make a bunch of cute tents.
 Fold Down the cone so that the seam falls in the back of the petal.
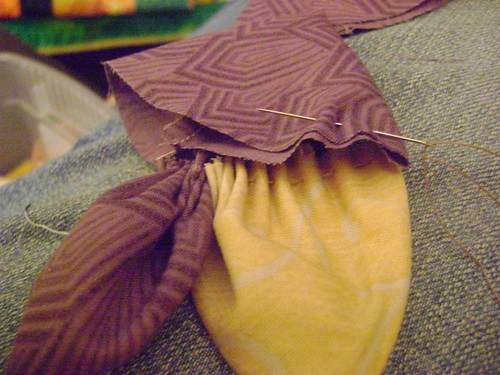
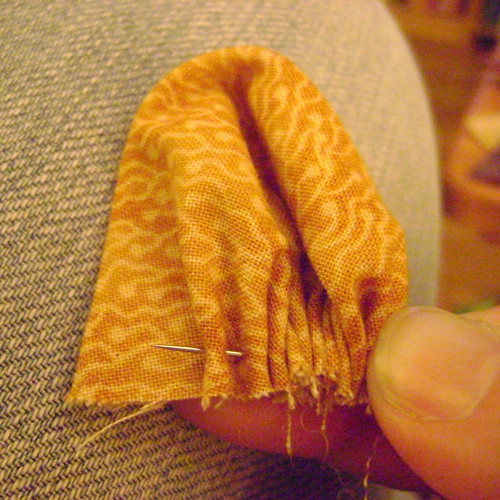
Using a strong thread, like upholstery or hand quilting thread, begin to gather the raw edge. The bottom may not line up perfectly, do not worry, just be sure to catch both layers.
Sew 8 petals together. Form a circle by sewing the last petal to the first petal. Tighten up your gathered edge and take and extra stitch then tie of your first layer.
 The second layer of petals uses the medium full circles.
Fold the circle in half WST and start gathering on the curved raw edge. Make sure to catch to top and bottom layer. Using the full circle makes a soft rounded petal. Sew four petals, sew the last one to the first one. Tie off BUT don't CUT your thread.

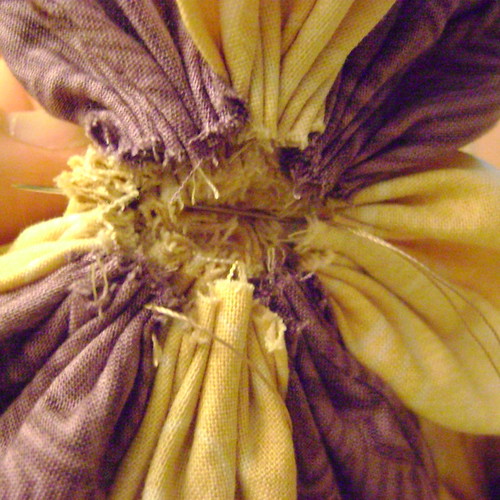
Place the smaller layer on to of the larger layer.
Stitch them together through the hole in the middle.


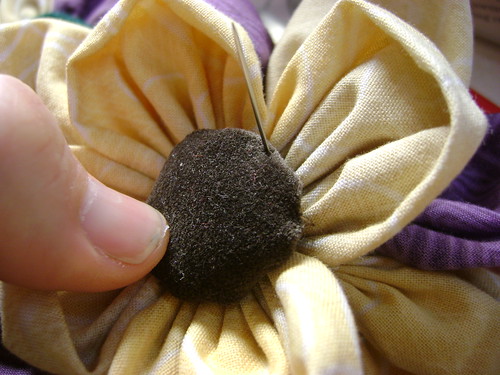
 Center Stuffed yoyo.
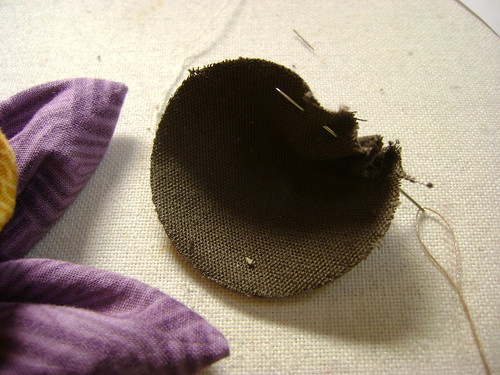
Use the 2 inch circle. Sew around the entire circumference of the circle, place a small bit of poly fil and gather up your stitches. Tie it off but don't cut the thread.
Sew the plush yoyo down to the center front of the flower.
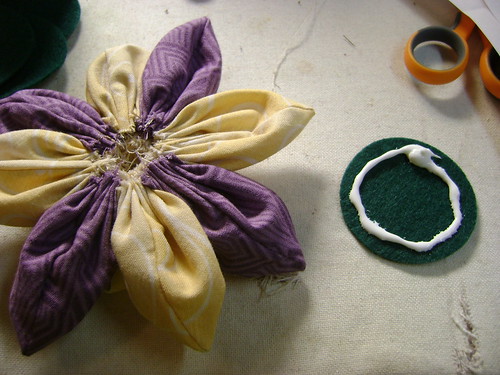
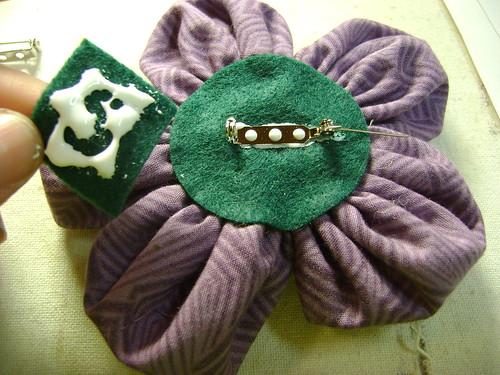
Using Super Thick Tacky Glue put a bead of glue on the green felt.
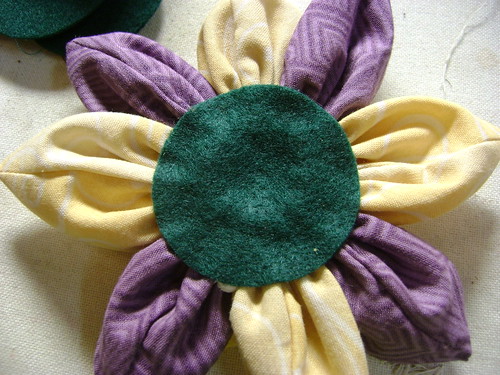
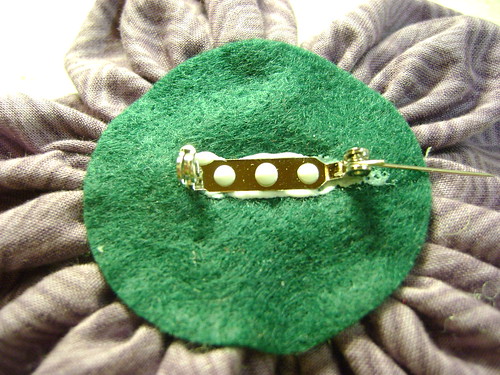
 Place it on the back of the flower, thus hiding all the raw edges.


Glue down the pin back.

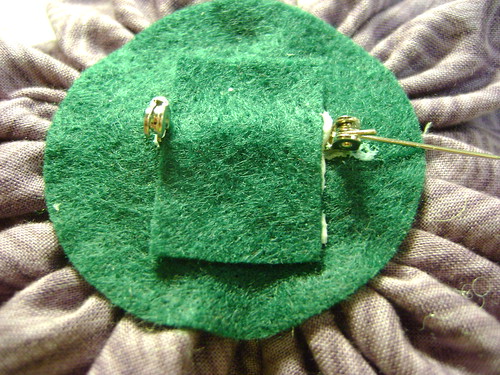
Cut a scrap of green felt the width of the inside of your pin back.
Glue the rectangle of green felt over the bar of your pin back

Hot glue could be used if you need instant pin backs, I prefer the Super Thick glue.

 This option has a covered button in the center, I found those a bit of pain to put in, since you have to wait until the green felt circle on the back is dried.  If you want to try a covered button we did a tutorial on making covered buttons you might want to see.
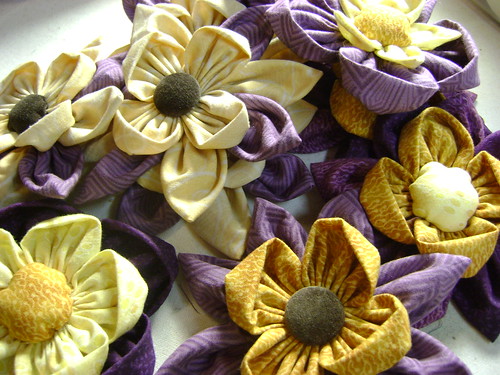
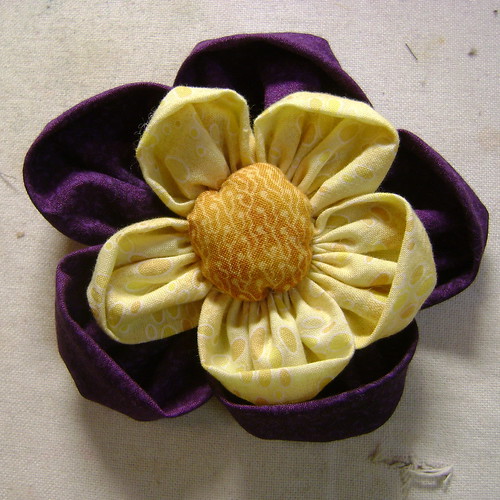
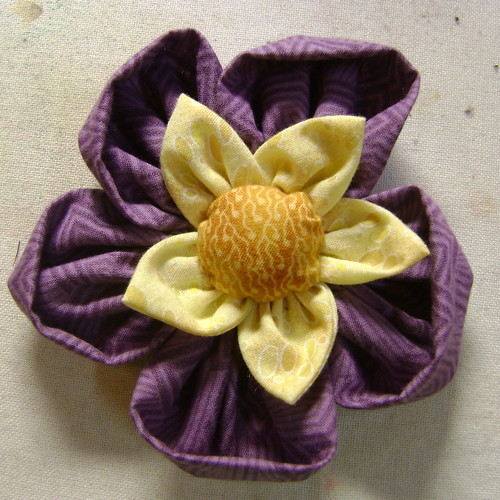
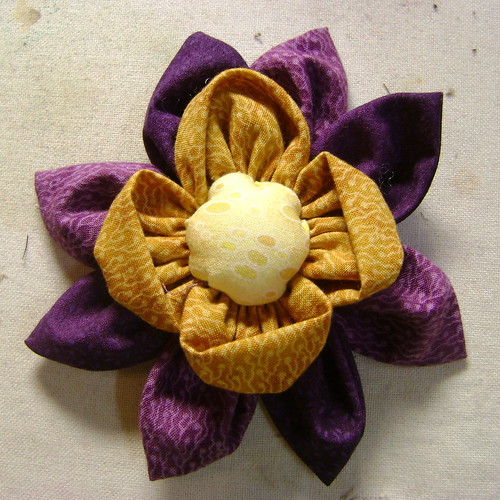
This example uses only full circles 5 large & 5 Medium, it is the sample for my students' MD project.
This example uses 5 large full circles and 5 medium half circles.

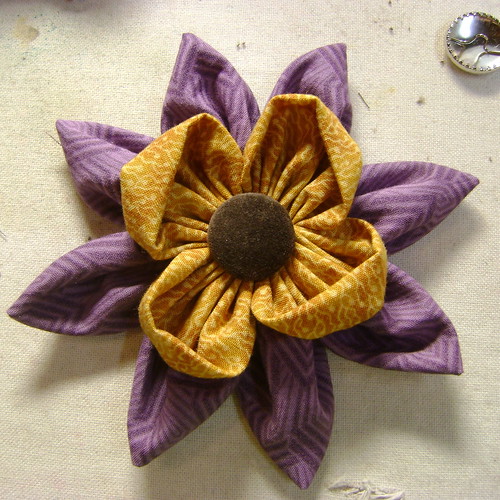
This is the tutorial flower with a yellow center.
Other ways to use your flowers:
Use a wreath form and make a fabric flower wreath for the door. Last year we made a wreathe of paper flowers that was a hit.
Attach a thick pony elastic to the the back (sew this in a I doubt the glue would hold)
Glue / sew it to a headband.
Sew it to a Farmers Market Tote

LinkWithin

Related Posts with Thumbnails