Showing posts with label Bags. Show all posts

"Stash Buster" Farmers' Market Tote

Using up lots of fabric here. This weekend I decided I needed a new tote bag for the farmers' market. I love our "Save the World" tote bag, which is great for the grocery store. The STW bags is tall and when I take it to the farmers' market I kinda crush the veggies in the bottom of the bag, plus I lose my money & keys in the depths.

What I need in my new tote:
A shortish bag - so I can't overload it and crush the lettuce.
A wide base / bottom.
Stiff sides so the bag does not collapse and will stay upright when placed it on the ground to pack up yummy fresh veggies.
A few clips that I can attach my keys and a yet unmade wallet to.
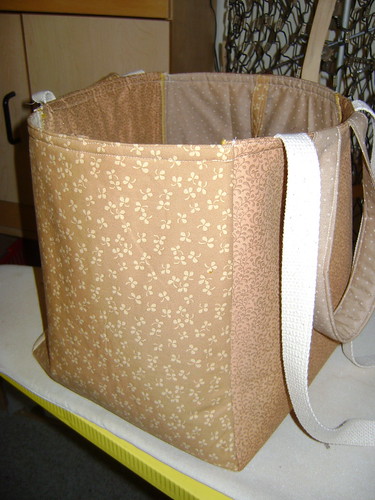
I made one early this am which met most of the requirements but it was not quite what I wanted (a craft fail).
Made some modifications after lunch and I am pleased with the results.

Please remember I am stash busting, at one point in my sewing life I was certain that I would love primitive quilting and only wanted to work in browns. I have a lot of brown fabric. Some of this fabric dates back to the Moda Quilt challenge of 2004 (?).

Supplies Needed:
8 Fat Quarters or equivalent fabric (about 2 yards).
1 yard Pellon Fusible Fleece
Walking foot on Machine
Optional
Cotton Strap Webbing
Swivel Clasp

1/2 inch seam allowance


Make your pattern! The pattern is super simple.
Fold a 18 x 20 pieces of paper in half.
At the top of the paper measure 5 inches from the fold. Mark it.
Measure down the fold 12.5 inches. Measure out from that point to 6 inches. Mark it. Draw a line from the 5 inch mark at the top to the 6 inch mark 12.5 inches below.
Using the 45 degree angle marks on you cutting mat and a straight edge. Mark the 45 degree angle from the 6 inch mark to the fold. (the length after the 12.5 inch mark to the tip of the pattern in about 6 inches).
Cut out your pattern.
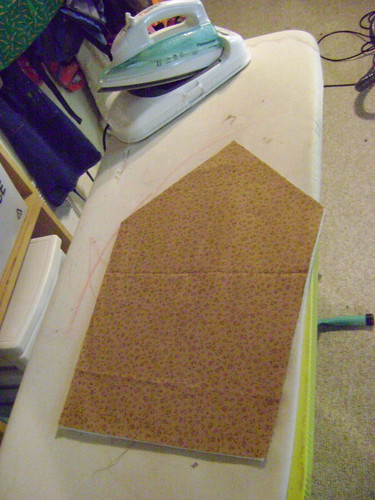
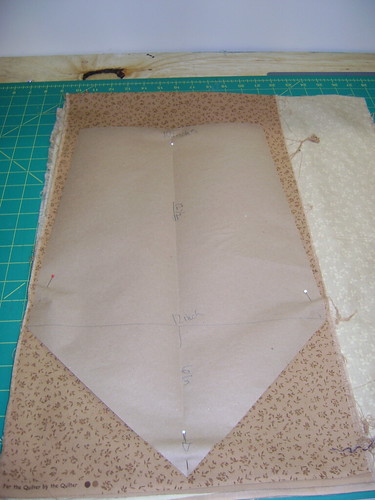
From Pattern
Cut 8 of quilt cotton.
Cut 4 of Fusible Fleece.
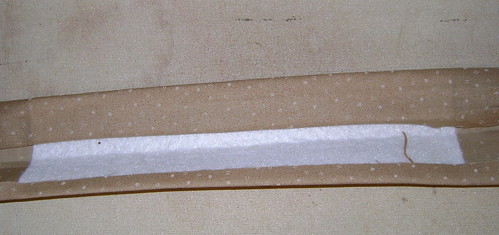
Press Fusible fleece onto the wrong side of 4 cotton pieces following the manufacturers instructions.

From scrap cotton cut 2 straps 5 x 15
cut 2 fleece pieces 4 x 6
Fuse the fleece into middle of the wrong side of the strap fabric.
Fold the fabric in to hide the raw edges and top stitch down.

From the cotton strap webbing cut two longer straps. I measured from my waist over my shoulder to my waist again (about 40 inches). I think it may be too long. I am going to drop it back to 30 inches on the next one.
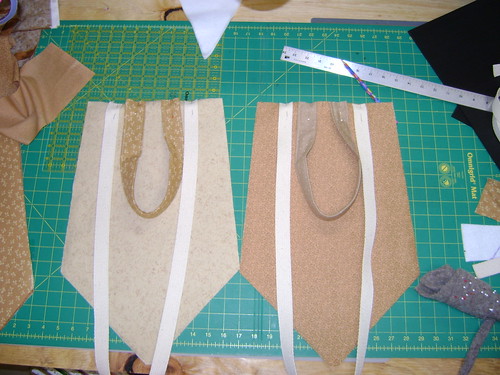
Take 2 of the cotton and fleece piece to a flat surface.
Mark the center top of both pieces.
Pin the short fabric straps .5 inches away from the center mark.
Pin the longer straps. 5 inches away from the fabric straps.
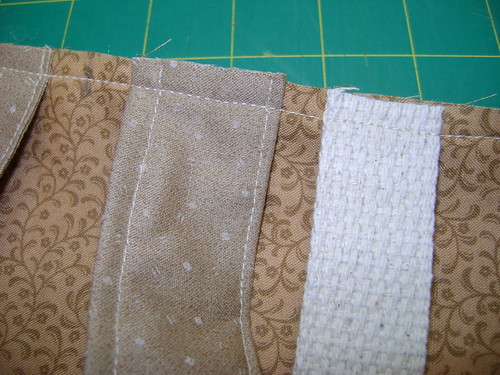
Stitch the straps down.
Optional Step:
Cut a 3 x 8 ish length from 2 other scraps of cotton.
Fold in the raw edges and top stitch.
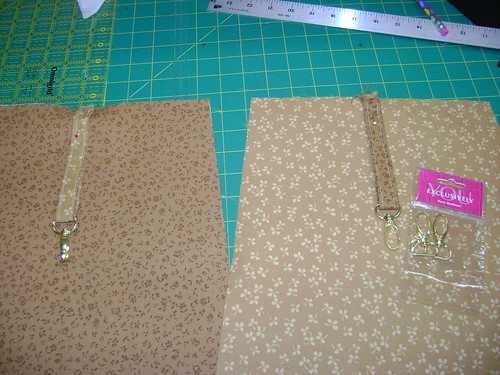
Slide the strap into a swival clip and pin into the center of the remaining 2 cotton/fleece pieces.
Stitch in place.
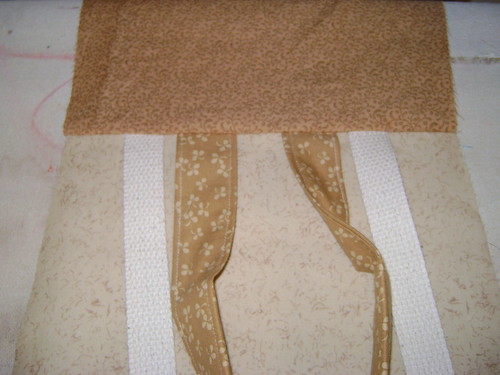
Take a plain piece of cotton and a cotton / fleece piece.
WST line up the top edge.
Sew across the top 1/2 inch from the raw edge.
Open, flip RS out press down.
Repeat 3 more times.
You now have four side with a finished top.
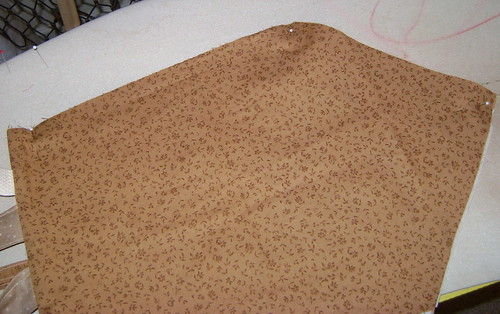
Take 2 pieces, one with straps, one with a clasp.
Lay them on top of each other. MAKE sure that the fleece cotton piece in on the inside.
Start stitching at the finished top edge BACK STITCH.
Pivot at the corner and then sew off the bottom point.
Repeat with other 2 pieces. Make sure you sew both side the same way.
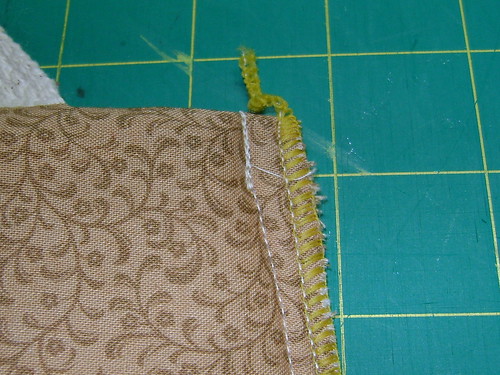
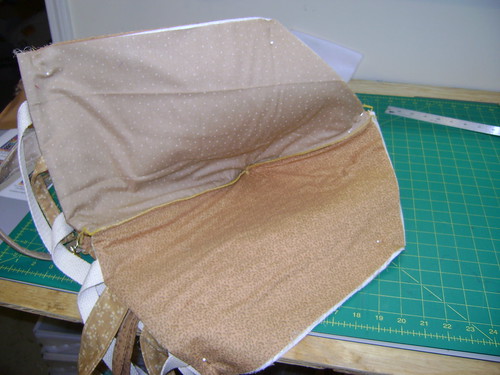
 Finish the side seam. I used a serger. A zig zag stitch will also work.
Open and turn one of the 2 sewn pieces.
Place finished side into the other finished side, you can see the raw edge outside.
Align and Pin.

Start sewing from one finished top, down the side, pivot, careful of the bottom seams, pivot at the side and back to the other finished top.
Back stitch at the start and stop.
Finish seams.
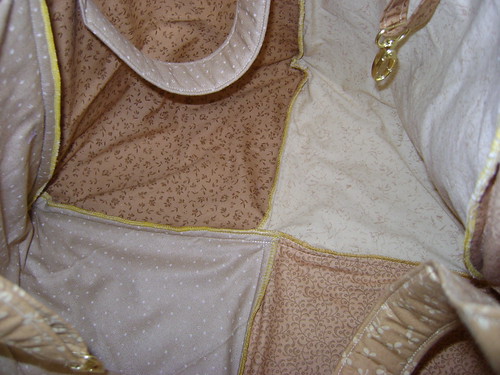
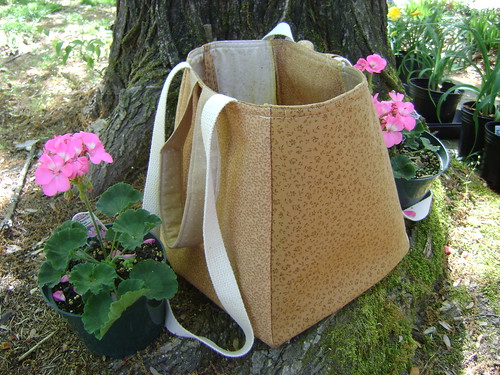
Detail inside bottom.

Top stitch around the top finished edge.
Make sure the swivel hooks are falling inside the bag.


Outside bottom detail.
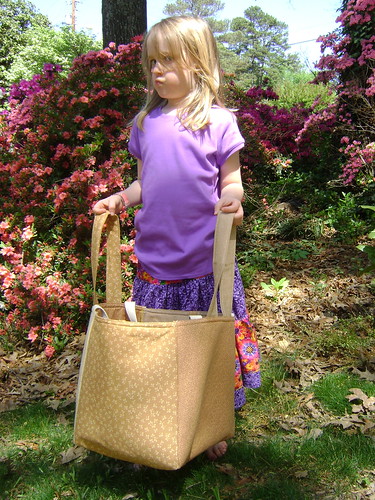


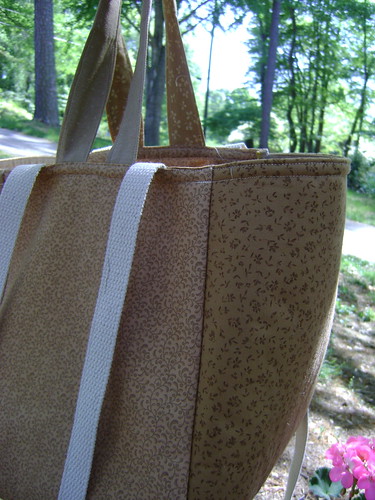
I am pleased with the bag. I used up about 2 yards of fabric. It stand up by itself. It is roomy with out being over large. Hopefully by next Saturday I will have the change purse with zipper and clasp ready so I can find my money to pay the farmers.

A Tisket, a Tasket a Beautiful Little Basket

What hangs on the door, catches on all your miscellaneous stuff, and uses just a little fabric? Why this little hanging basket from In Stitches by Amy Butler. I think I shall make one for every door in my house and then maybe my counters would stay clutter free.

Melly and Me


Hope you all are having a great summer. We are. We just checked in again at the Melly and Me blog and Melly's a new auntie and quite proud. The laptop bag she's working on ain't no slouch either.

Here's a link to their patterns. We love them so much and we're proud to be able to carry them for you in the US.

3 Bags One Pattern

Some patterns are so easy that you wonder why you get them but I was looking for a great introductory pattern for teaching a group of tweens to sew. The Kwik Sew 3597 Pattern hit the spot, an easy to make unlined tote with and an internal pocket attached to the top facing. This pattern will amuse you if you have been sewing for 20 years but if you are teaching some one to sew they will appreciate the thorough, easy to follow instructions and the quick results.

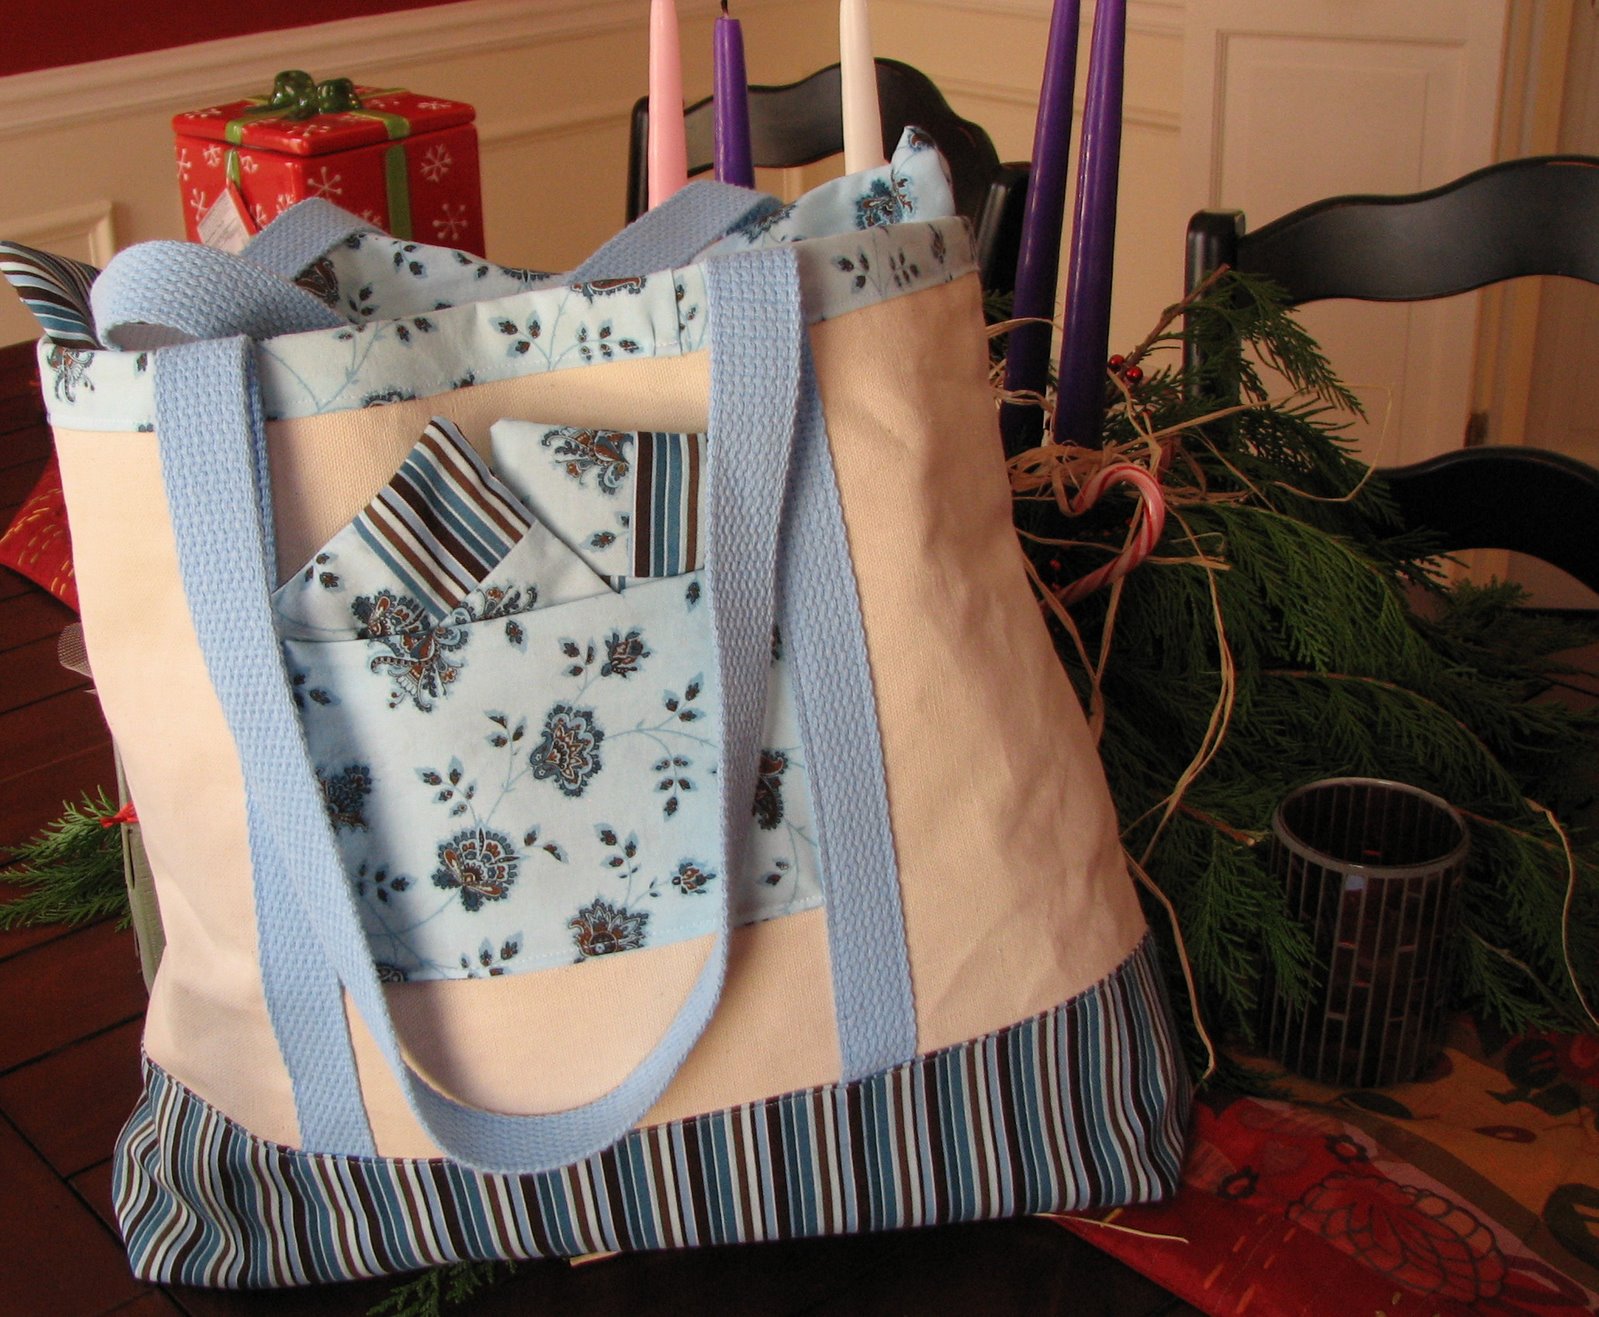
I used Corona Canvas as my base. I love this fabric. Corona canvas is a finely finished fabric that is thinner than most canvas. I originally purchased it to make pants, it comes in a bunch of great colors, but I use it for all kinds of stuff that needs a bit more body. The other fabrics are the scraps from other projects. All in all I love the bag pattern, I used the small size, which is great library tote or purse, I think the largest size would make a good shopping bag. This summer I am trying to get as many samples done as possible, so stay tuned, there are more quilts and bags on the worktable.

Cute Zippered Bag Tutorial

This is my happy design, last month I purchased 50 small zippers for a class, when the class fell through I started working on a small zippered bag / pouch pattern to share. The proto type was made for a four year old my daughter loves, for her birthday.

This is a great size bag for small gifts, or as a make up bag or as a large change purse. The top of the bag has a slight curve which I love and the bottom is boxed. I finished the tutorial the am but I am already thinking about ways to make the bag better. I think I might add a wristlet or a bit of ribbon to hook a key to. I am getting ready for the holidays and I am getting as much sewing done as I can this summer.

Find the tutorial here.I finished these last night, on my way to a handmade holiday.

New Patterns from Melly & Me


Well, I am automatic order with the folks in Upper Ferntree Gully and there are new patterns in from Melly and her sister Rosalie Quinlan. Introducing Petunia, Dudley, Florance, Blossom the butterfly and a new purse pattern Flower Garden. We also added one of their quilt patterns Billie, which I am making a sample of using Malibu Monkey.
From Rosalie we have 6 of her beautiful primitive dolls and her new book called Gifts which is perfect for those of you starting your holiday gift making. Proceeds from her book support Breast Cancer Research, she is a surviver.

One Zipper - Lots of Bags

I am on summer holiday right now and I have BIG PLANS, I tell you, BIG PLANS!

None of which have anything to do with what I have been sewing for the past three days. I went to Gail K last week with the wild idea that I would show folks how to put in a zipper as part of my skill demo at the QSA. Well, it would help if I had a pattern ready and did not decide to teach zippers the day before I left. Another small difficulty is the machine I bring to shows, love it but don't have a zipper foot for it.

I had to scratch the zipper idea but it was gnawing at me so I picked it right back up when I got home. I have made about 15 different bags and may have finally figured out which on I like the best, which is good since I have about 40 more zippers to use up. I promise to post a picture of the winning bag and some instructions when I have a winning bag.

Meadow Bag - Melly & Me

Meadow is the newest bag from the sister team Melly & Me. I love the hip young look of all of their projects and this purse looks GOOD and it is easy to make, only taking about an hour. BUT where are the pockets. Whenever I make a sample for the store I follow the directions without modification but on this one I will certainly add some internal pockets or maybe just a Porta Pocket to my next version. The bag was super popular this past weekend at the Alabama Quilting Symposium, silly me I forgot to bring the Jitterbug fabric. I would have sold a bunch of it.

Peace on Earth from Moda


I can smell a traditional Olde Tyme Christmas in our future. Peace on Earth from Moda hits all of the right spots. It even HAS spots... er, okay DOTS! Dots, stripes, holly, evergreen, berries and to really bring the spirit of Peace on Earth, we even see old world maps for the truly global Christmas. I can see a holiday tables set with hand made cloth napkins and table runners. Or couple of new stockings for those extra guests or last minute gifts.

Berries and maps make great shopping totes and gift bags too. Where to start? At the Some Art Fabric Christmas Shop of course!

This pattern book is a great resource for all of these ideas. Happy Hour contains super simple quilts, a tote bag, table runner, and pillow.

Favorite Things Lunch Bag


I had a lot of fun putting together this cute lunch tote. I used the new Posh line from Moda and the pattern is by Favorite Things. The instruction are clear and easy to follow. I think on the next one I will extend the flap. I added yo yos on this one to fancy up the front. I think I may add a inside pocket too.

In my opinion, this bag is also the perfect size baby bag, a couple of diapers, wipes, a bib, a dangle toy and you would be set.

All in all it is a good size lunch bag or an on the go baby bag.
Here is their photo, is is a bit spiffier than mine.

A Bag for ME

This may look like just another cute bag because of the fabulous fabric, but in all honesty, it is the PERFECT bag! It has room for all my stuff which always includes a miniature first aid kit, a notepad, a box of crayons, and my ever important inhaler. Add to that credit cards, identification, my ASG calendar, a cell phone, tissues, and all the other random things that end up in my purse and we have the makings of a disaster, but NOT in this bag! The reason this bag works so well....lots of pockets, a credit card organizer, a clear window for ID, a cell phone pocket, and elastic to secure a couple pens. See for yourself...


So after all those mad ravings, I'm sure you are just a bit curious about the pattern! The pattern is Odyssey by Studio Kat. I have to admit, this bag is a bit of an odyssey and not for the easily defeated. It has about a zillion pieces and 7 pages of instructions! My suggestion is to be very methodical in cutting everything out. Pin all the fabric to the pattern pieces or you will never remember which little squarish piece is which. The edges get a little bulky and my machine groaned a few times as I crammed stuff under the presser foot. It is also a bit akward to maneuver at times with all the bulk. The assembly is nothing short of ingenious even though it involves a lot of basting and some hand stitching.
The pattern calls for a purse zipper which I ordered online only to receive the wrong kind of zipper and find out after it was already installed that Hancock's carries them! The zipper pocket should have the zipper pulls in the middle not on either side like mine. I don't think that's going to be a big deal for me though. I may make another just to have the right zipper!

All in all, this was definitely worth the effort, 2 trips to Hancock's, online order of the wrong zipper, and lots of basting! I think this purse will serve me well through the summer! Maybe the next one will be a winter version!

And Bingo Was a Bag-O


Mom recently requested a bag to carry to Bingo. No my mom isn't old, she just likes to gamble and that's the most convenient place. She has to keep track of her daubers, her Coke, and all her $100 bills that she wins. Being the good daughter that I am, and knowing that my mom is nothing if not fashionable, I set out to make the perfect Bingo Bag.

The requirements were simple, not too big, lots of pockets, and my own requirement, FUN! I poked around the web for ideas and found these absolutely hideous bags they are selling for Bingo players. Yes, there are websites for the sole purpose of selling Bingo paraphanalia. You would not believe the selection of daubers! None of those ugly bags were going to do for my stylish mom. I poked around my sewing room and stumbled across the Lazy Girl Gracie Bag pattern. It had lots of pockets, an interesting silhouette, and was the perfect size! Ok, fabric...hmmmm. I found some scraps from making my husbands boxers (yes he wears gambling boxers) and some polka dots that are supposed to be for another project (oh well, I know where to get more) and some great red twill left over from my most recent pair of pants.

It all came together to make the most adorable bag! I even tried something new...printing fabric through my inkjet printer. I ironed it to some wax paper and found the perfect picture for the closure. I swiped it off the internet which I'm sure poses some legal issues but it's for MOM! Surely, she would bail me out?

Gift Bags


Oh, that there were more hours in a day. Oh, that I didn't have to eat and sleep. Think of all the things I could accomplish! Somedays I think my life would be so much simpler if nobody knew that I sewed. Everyone expects handmade gifts from me which brings me to my latest late night, last minute, creation!


My Sunday school class has an annual Christmas auction with proceeds being used to support our class charity projects throughout the year. Last year I made a couple Lazy Girl purses that went for $125 each! Finally, I'm getting paid what I'm worth....too bad I don't get the money. Of course being the seamstress that I am, I couldn't drop the ball and buy something to auction off this year. I've been making these buckwheat hull travel pillows and thought they would be a good item for the auction. Problem is, just a pillow seemed a little, well, boring! Travel pillow, travel, ...how about a travel gift set? Now to execute my well thought out plans. Actually, I had hatched 2 ideas, a travel bag, and a spa basket. The spa basket was simple, buy a basket at Target! The travel bag, well, that needed just the right bag to bring the set together.


Have you ever held up your hands and said "I need a bag about this big"? That's how I got the size for this one. I cut 2 rectangles 19 wide x 13 high. Ok, honestly, I cut it 19 x 15 and then decided it was too high and lopped off 2 inches after it was mostly constructed. The bottom is boxed to make a 3 inch deep bag. I used 1/2 inch seam allowances. Lazy me didn't bother lining the bag. Instead I bound the seams on the inside with 1 1/4 inch strips of fabric. I don't fold under or cut bias. They stay well enough and look finished if you glance in the bag! I filled the bag mostly with bubble wrap and then added the pillow, a travel mug, and a candle. In the front pocket I added some lavender sachets.


Hmmm, if a little purse goes for $125, what will be the auction price of the tote and basket?

Save the World Shopping Totes


Wow this month is CRAZY. I finally finished up the directions for the first official Some Art Fabric pattern, inspired by my DH. Every time I make a bag he wants to know if it is sturdy enough to be a shopping tote. Finally, I can say yes. These bags are big, hold a bunch of groceries and get comments from every one I meet. I have a great time looking for food fabric.

If you get a chance to make one please send pictures. We are thinking about having a contest, another first.

Pattern available at the shop.

Apropos Pack - Studio Kat Design


Martha gave this small bag by Studio Kat a great review and I sure do appreciate her plug.

The frog fabric is called Bazaar and it has been very popular.

LinkWithin

Related Posts with Thumbnails