In the final summer of the Atlanta College of Art, my older daughter and I decided to continue our education with some community ed. It was a sad summer to be at ACA, feelings were mixed, their purchase by Savannah College of Art & Design did not fit well with all. As a SCAD grad I understood, but I know that you can't mess with SCAD it has a life force all it's own.
Anyway this post is supposed to be about me being cool before my time:
See the view master disc, I though I was all that. Melody Miller eat your heart out, granted she is the one with a fabric line not me :-)
Showing posts with label Craft. Show all posts
The Sneater Invasion
We had an outrageous time today at the Original Sewing & Quilt Expo in Atlanta.Colleen Maria Casey (that's me) led a group of adventurers on an expedition to discover a band of wild Sneaters.
Actually it was a blast, but no one had trapse through the jungle.
In a lovely classroom at the Expo, we gathered Sneater kits got to work.
Do you see your Sneater in the photo?
Like our post on Facebook and show your friends your handywork!
![]() |
| Like this post on Facebook and claim the Sneater YOU discovered! |
These cuties are made from felted wool sweaters and love hugs.
Comedy Of Errors
Have you ever had an idea, then bumbled your way through figuring it out, spent way more than you anticipated and yelled at your kids because it was all for them?
That would about sum up the holiday gifts we (I) made (are making) for my daughters' friends and teachers.
Idea!! Magnets are cool but who wants them for just the refrigerator. I want to make a necklace with magnets that kids can swap (cause I am so over silly bandz).
Research: I see it on etsy, looks doable. A lot of folks use bottle caps, those make me nervous they have sharp edges and you fill them with epoxy, yuck! I see that they now have an epoxy style sticker, still sharp edges. My best bud has a 1 inch button maker I can borrow. DONE! Let's order the magnet button supplies (100 is the minimum, we don't have that many friends, we will give multiples) and something that we can make into a pendant.
Reality: I am cheap, I don't want to order bezel pendants, so what else would work? Dog tags out of stainless steel, much less than pendants.
Delivering Ornaments
Before I leave for the West Palm Quilt show I have to send out the first batch of my ornaments to galleries. Here is where you can find the exceptionally awesome stuff I make.
Naked Art, Birmingham, AL
They just moved into their new location
3831 Clairmont Avenue
Birmingham, AL 35222
Craftland
235 Westminster Street
Providence RI 02903
Craftland Show is a month-long annual holiday sale in downtown Providence, RI that celebrates all kinds of sparkly handmade objects and the 170 artists who make them.
Atlanta Events
Spruill Gallery
Naked Art, Birmingham, AL
They just moved into their new location
3831 Clairmont Avenue
Birmingham, AL 35222
Craftland
235 Westminster Street
Providence RI 02903
Craftland Show is a month-long annual holiday sale in downtown Providence, RI that celebrates all kinds of sparkly handmade objects and the 170 artists who make them.
Atlanta Events
Spruill Gallery
Opening Reception: November 18
4681 Ashford Dunwoody Road
Atlanta, Georgia 30338
4681 Ashford Dunwoody Road
Atlanta, Georgia 30338
Opening Reception: Thursday, November 18, 2010
The Work of Our Hands Artists Market will be held from November 18 – 21 at The Cathedral of St. Philip. This acclaimed show features nearly 90 local and regional artists. Proceeds from the show support the Emmaus House and the Agape Center.
Indie Craft Experience
November 20 + 21 at Ambient Plus, 11am-6pm both days.
The Holiday Shopping Spectacular will be our 11th show and will feature 100 of the best indie crafters from the Southeast and beyond! Can't wait!
Opening Reception: Friday, November 26th - Black Friday - 4 -9 pm
The Work of Our Hands Artists Market will be held from November 18 – 21 at The Cathedral of St. Philip. This acclaimed show features nearly 90 local and regional artists. Proceeds from the show support the Emmaus House and the Agape Center.
Indie Craft Experience
November 20 + 21 at Ambient Plus, 11am-6pm both days.
The Holiday Shopping Spectacular will be our 11th show and will feature 100 of the best indie crafters from the Southeast and beyond! Can't wait!
Opening Reception: Friday, November 26th - Black Friday - 4 -9 pm
November 26th - December 30, 2010
Woodruff Arts Center, 1280 Peachtree Street NE, Atlanta, GA 30309
Flower Book Belt
More fun with the fabric flowers. Here is the tutorial on how to make the flowers.
Supplies
Finished Fabric Flower
2 D rings
Black Felt circle 2 inches
Grosgrain Ribbon in a size that fit your D rinds
Super Thick Tacky Glue
Measure around your book with your ribbon add a few inches to be safe, you can cut it down later.
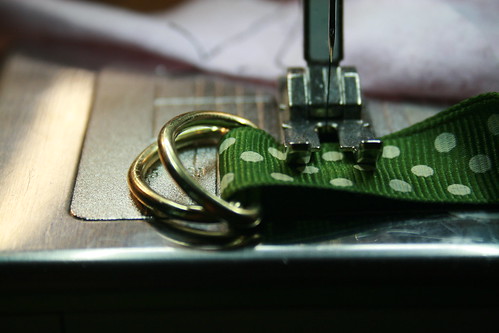
Slide the 2 D rings onto the end of the ribbon.
Fold over at approximately an inch.
Stitch Down the ribbon.
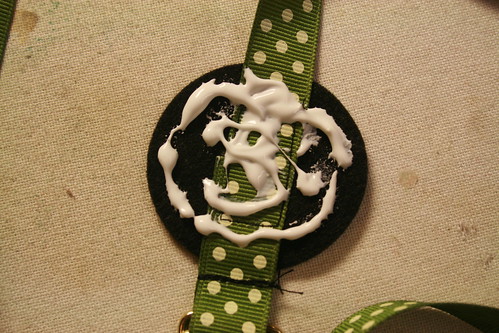
Sew the 2 inch Felt circle to the ribbon WST.
Smear on some Super Thick Tacky Glue.
Press the gluey felt circle to the existing felt circle on the finished back of your flower. Let it dry.
A Book Belt!
Look good at the pool with your very fashionably attired book!
Fabric Flower Wreath
So I made some (like 12) fabric flowers. I love my MIL, she is not going to wear one much less 12. So onto the making of a wreath.
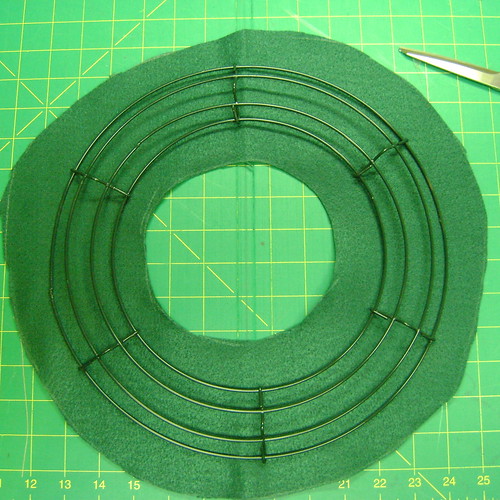
I had a wire wreath in my stash.
I placed it on some green felt and marked around the wreath about an inch away from the edge.
Then I cut out the felt.
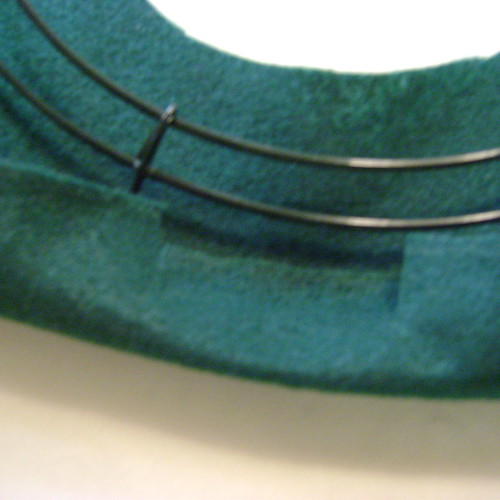
I snipped ease into the outside and inside curves to make it easier to glue.
Use a hot glue gun to attach felt to the wire.
Start on one exterior side, then attach a flange on the opposite side, then to the top, then to the bottom.
This should help keep it wompus instead of caddy wompus.
Looks pretty good if you don't check the back.
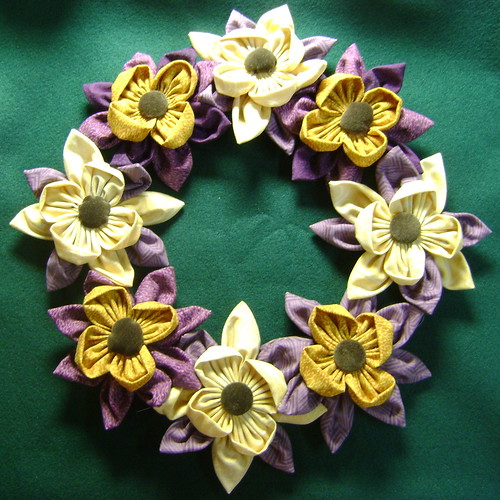
Evenly distribute your fabric flowers ( I only used 8) and hot glue them down to the felt. I am pretty in love with this I need to make a few in my favorite colors.
The tutorial for the flowers is here.
I had a wire wreath in my stash.
I placed it on some green felt and marked around the wreath about an inch away from the edge.
Then I cut out the felt.
I snipped ease into the outside and inside curves to make it easier to glue.
Use a hot glue gun to attach felt to the wire.
Start on one exterior side, then attach a flange on the opposite side, then to the top, then to the bottom.
This should help keep it wompus instead of caddy wompus.
Looks pretty good if you don't check the back.
Evenly distribute your fabric flowers ( I only used 8) and hot glue them down to the felt. I am pretty in love with this I need to make a few in my favorite colors.
The tutorial for the flowers is here.
Fabric Flowers For Mother's Day
What to do? What to make for the super mom in your life? I am not fond of dead flowers, more commonly known as cut flowers. It bothers me that they are chopped off at their prime and stuck in sugar water for my personal enjoyment. If you want to give me vegetation it should have some roots. So to that end, every year I purchase my mom & myself a new (old) antique rose. I usually visit our local nursey Hastings. If you are in the Metro Atlanta area and have never visited, it is a treat, my kids love it: turtles, fish, parrots and sometime even bunnies along with many hard to find plants. The antique roses are amazing and they thrive with no spraying or extra work. They make me smile for months instead of days. This year after they bloom I am going to try making some rose cutting and see if I can make more of my antiques roses to share. I have successfully rooted only one rose and it was an important one. I took the cutting from the roadside of 515 near Blue Ridge during one of the many round trips I make 3 years ago during my mom's chemo. This rose has not bloomed yet but it has buds this years and I will share as soon as I have pictures.
Wow, What was this post supposed to be about? Fabric Flowers! Let me get back on topic!
So since I don't give cut flowers and fabric flowers last forever here is how to make some.
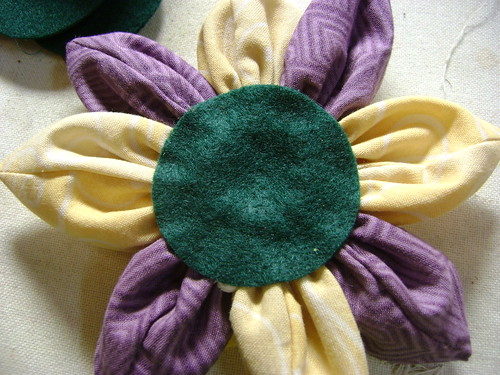
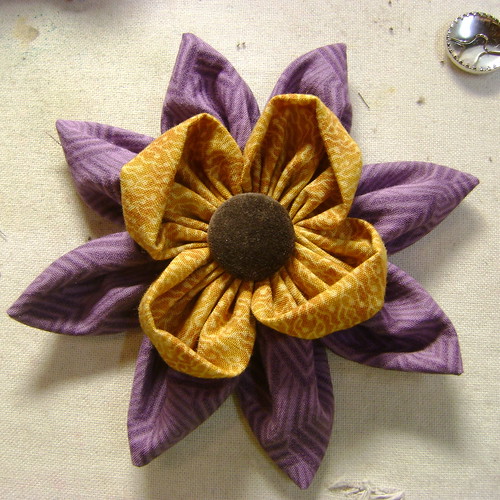
Pick out your favorite (or their favorite) colors. My MIL loves lavender / purple. Cut out some circles.
For each flower you will need
4 large (5.5 inches)
4 medium (4 inches) circles,
1 small (2 inches) circle Brown or Yellow Fabric,
1 small (2 inches) circle Green Felt.
Thread, Glue and a Pin back.
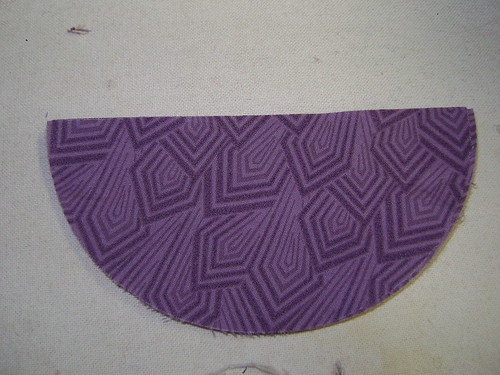
Cut the large (5.5 inch) circles in half. Making 8 half circles.

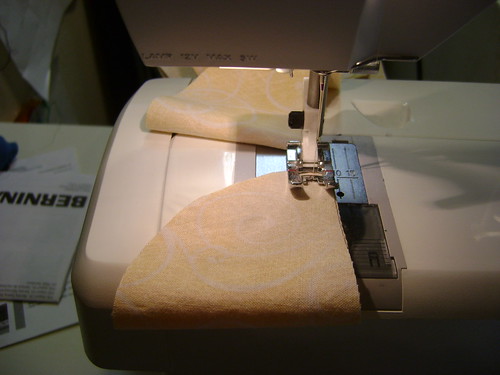
Fold the half circles into quarter circles RST and stitch down the straight edge (1/8 inch seam allowance). Snip apart.
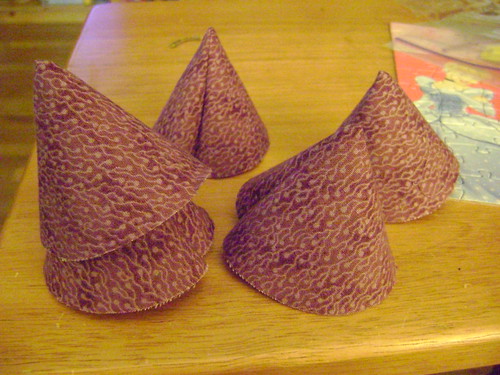
Flip right sides out and make a bunch of cute tents.
Fold Down the cone so that the seam falls in the back of the petal.
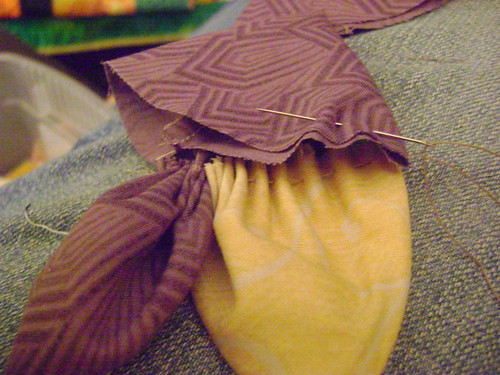
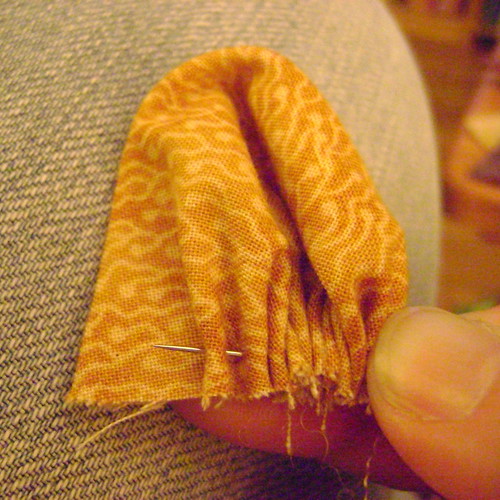
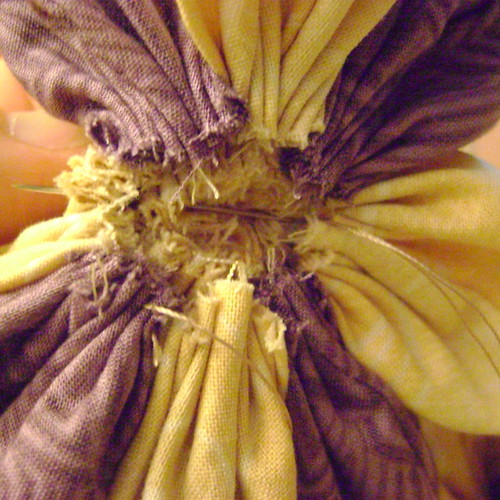
Using a strong thread, like upholstery or hand quilting thread, begin to gather the raw edge. The bottom may not line up perfectly, do not worry, just be sure to catch both layers.
Sew 8 petals together. Form a circle by sewing the last petal to the first petal. Tighten up your gathered edge and take and extra stitch then tie of your first layer.
The second layer of petals uses the medium full circles.
Fold the circle in half WST and start gathering on the curved raw edge. Make sure to catch to top and bottom layer. Using the full circle makes a soft rounded petal. Sew four petals, sew the last one to the first one. Tie off BUT don't CUT your thread.
Place the smaller layer on to of the larger layer.
Stitch them together through the hole in the middle.

Center Stuffed yoyo.
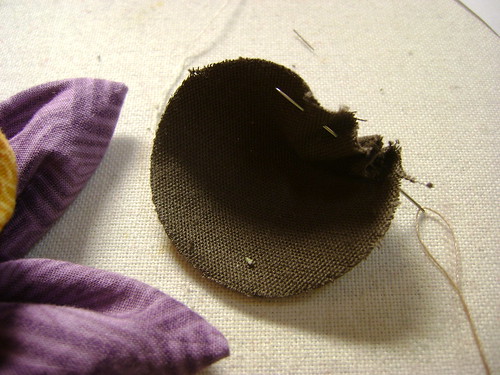
Use the 2 inch circle. Sew around the entire circumference of the circle, place a small bit of poly fil and gather up your stitches. Tie it off but don't cut the thread.
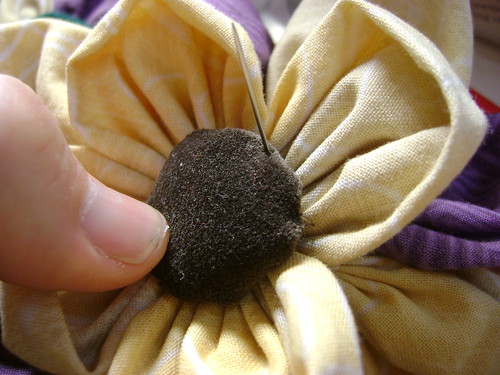
Sew the plush yoyo down to the center front of the flower.
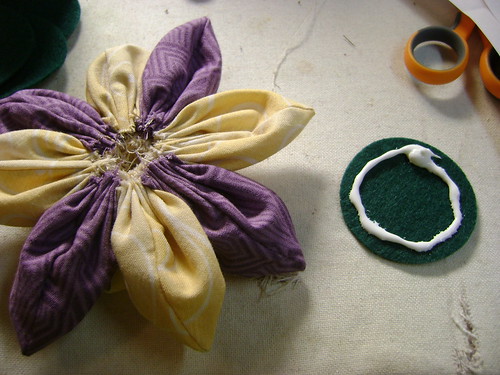
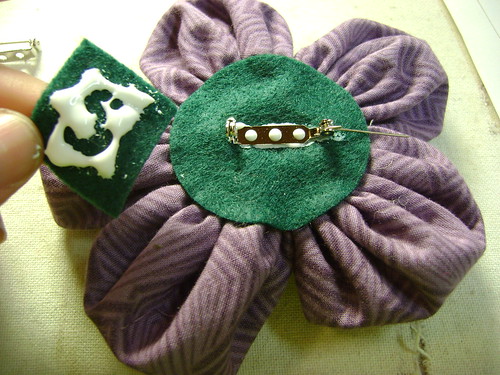
Using Super Thick Tacky Glue put a bead of glue on the green felt.
Place it on the back of the flower, thus hiding all the raw edges.
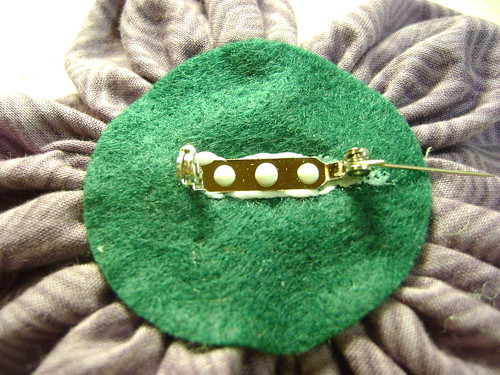
Glue down the pin back.
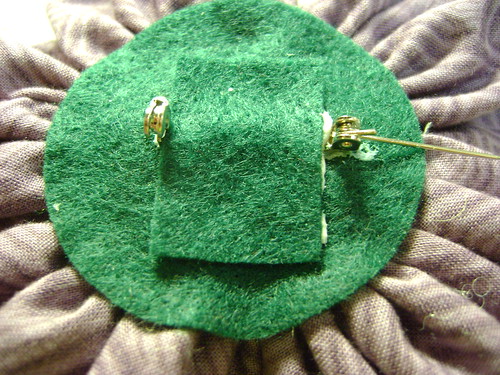
Cut a scrap of green felt the width of the inside of your pin back.
Glue the rectangle of green felt over the bar of your pin back
Hot glue could be used if you need instant pin backs, I prefer the Super Thick glue.
This option has a covered button in the center, I found those a bit of pain to put in, since you have to wait until the green felt circle on the back is dried. If you want to try a covered button we did a tutorial on making covered buttons you might want to see.
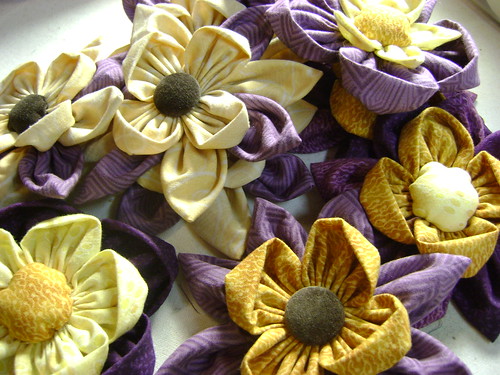
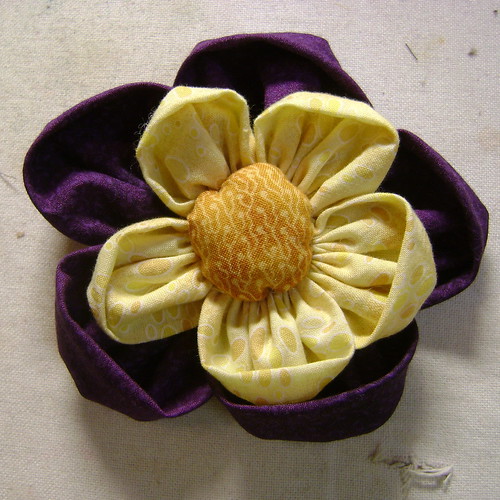
This example uses only full circles 5 large & 5 Medium, it is the sample for my students' MD project.
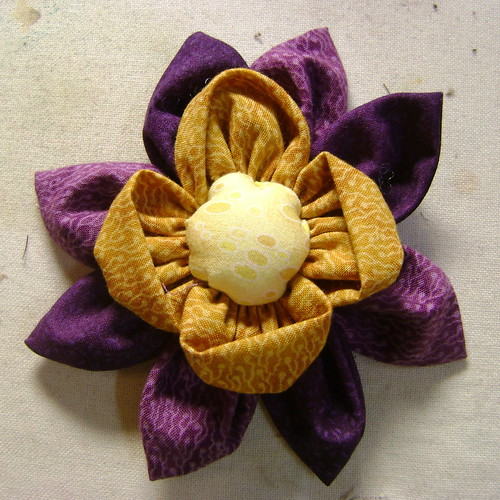
This example uses 5 large full circles and 5 medium half circles.
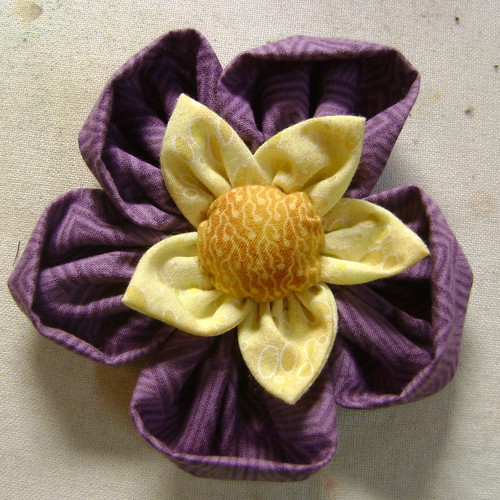
This is the tutorial flower with a yellow center.
Other ways to use your flowers:
Use a wreath form and make a fabric flower wreath for the door. Last year we made a wreathe of paper flowers that was a hit.
Attach a thick pony elastic to the the back (sew this in a I doubt the glue would hold)
Glue / sew it to a headband.
Sew it to a Farmers Market Tote
Wow, What was this post supposed to be about? Fabric Flowers! Let me get back on topic!
So since I don't give cut flowers and fabric flowers last forever here is how to make some.
Pick out your favorite (or their favorite) colors. My MIL loves lavender / purple. Cut out some circles.
For each flower you will need
4 large (5.5 inches)
4 medium (4 inches) circles,
1 small (2 inches) circle Brown or Yellow Fabric,
1 small (2 inches) circle Green Felt.
Thread, Glue and a Pin back.
Cut the large (5.5 inch) circles in half. Making 8 half circles.
Fold the half circles into quarter circles RST and stitch down the straight edge (1/8 inch seam allowance). Snip apart.
Flip right sides out and make a bunch of cute tents.
Fold Down the cone so that the seam falls in the back of the petal.
Using a strong thread, like upholstery or hand quilting thread, begin to gather the raw edge. The bottom may not line up perfectly, do not worry, just be sure to catch both layers.
Sew 8 petals together. Form a circle by sewing the last petal to the first petal. Tighten up your gathered edge and take and extra stitch then tie of your first layer.
Fold the circle in half WST and start gathering on the curved raw edge. Make sure to catch to top and bottom layer. Using the full circle makes a soft rounded petal. Sew four petals, sew the last one to the first one. Tie off BUT don't CUT your thread.
Place the smaller layer on to of the larger layer.
Stitch them together through the hole in the middle.
Center Stuffed yoyo.
Use the 2 inch circle. Sew around the entire circumference of the circle, place a small bit of poly fil and gather up your stitches. Tie it off but don't cut the thread.
Sew the plush yoyo down to the center front of the flower.
Place it on the back of the flower, thus hiding all the raw edges.
Glue down the pin back.
Cut a scrap of green felt the width of the inside of your pin back.
Glue the rectangle of green felt over the bar of your pin back
Hot glue could be used if you need instant pin backs, I prefer the Super Thick glue.
This option has a covered button in the center, I found those a bit of pain to put in, since you have to wait until the green felt circle on the back is dried. If you want to try a covered button we did a tutorial on making covered buttons you might want to see.
This example uses only full circles 5 large & 5 Medium, it is the sample for my students' MD project.
This example uses 5 large full circles and 5 medium half circles.
This is the tutorial flower with a yellow center.
Other ways to use your flowers:
Use a wreath form and make a fabric flower wreath for the door. Last year we made a wreathe of paper flowers that was a hit.
Attach a thick pony elastic to the the back (sew this in a I doubt the glue would hold)
Glue / sew it to a headband.
Sew it to a Farmers Market Tote
Sneaters
Little Bit is lovin' all the new Sneaters! I dropped them at Young Blood Gallery & Boutique last week. I will have more soon, promise!

Hey what is a Sneater?
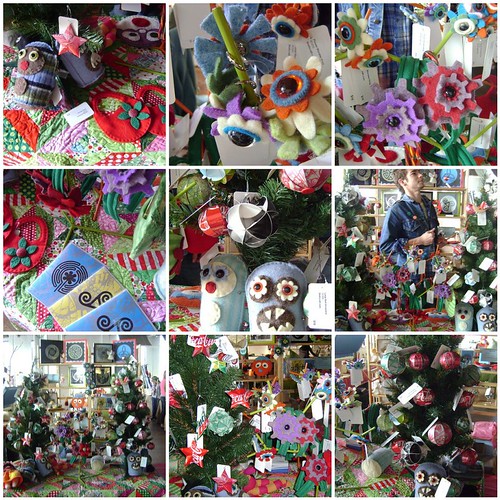
A Sneater is a snugglie plush creature made from recycled sweaters. Hug them, hold them, share them with a kid. Each one is a unique one of a kind creation. These Sneaters have a special pocket to hold your very best smile.
Hey what is a Sneater?
A Sneater is a snugglie plush creature made from recycled sweaters. Hug them, hold them, share them with a kid. Each one is a unique one of a kind creation. These Sneaters have a special pocket to hold your very best smile.
microlove @ Naked Art
Next cool show from the wonder team of Naked Art in Birmingham Alabama.

microlove
Miniature art and handcrafted jewelry from a wacky pack of artists
Opening reception February 5 & 6
Gift Guide for Valentine's Day will be up online soon.
Opening reception February 5 & 6
Gift Guide for Valentine's Day will be up online soon.
The one eyed ring is by your truly!
Working the Window @ VSA
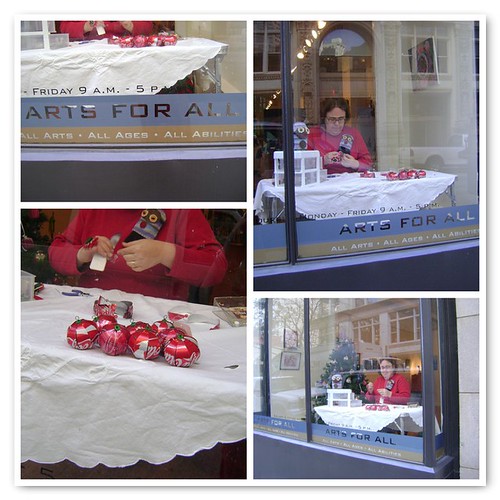
Last week I got to sit in a window @ the VSA Gallery for 4 hours and make ornaments. Lots of folks stopped to watch. Good Fun was had by all.
Sloth Craft @ ICE
Wow ICE was a blast. The place was hopping all day long. The soda can ornaments were a huge hit. My nephew came along for the ride and found some gifts, mostly for himself. I slept for a couple of days to recover.
E*L Sapo's 11th Annual Holiday Artist Market
Handcrafted Artful Gifts from over 25 local artists!
folk art to fine art and everything in between
Opening Party Wed, Dec. 2, 2009 (6pm - 8pm)
Thur, Dec. 3 (10am - 5pm)
Fri, Dec. 4 (10am - 4pm)
Sat, Dec. 5 (10am - 4pm)
Sun, Dec. 6 (1pm - 4pm)


I have all of Thanksgiving Holiday to power up on crafty goodness.
Subscribe to:
Posts (Atom)