microlove @ Naked Art

Next cool show from the wonder team of Naked Art in Birmingham Alabama.


microlove
Miniature art and handcrafted jewelry from a wacky pack of artists

Opening reception February 5 & 6
Gift Guide for Valentine's Day will be up online soon.

The one eyed ring is by your truly!

Papa Ho Ho & his ballerina


This past week was little ones first ever ballet performance, she rocked the house for about 5 minutes of a 2 hour long performance. My dad (aka Papa Ho Ho to my girls) came down in his gig outfit and cause a bit of a ruckus.

Green Sleeve Fashion Show @ whitespace


Last night we went out to a very fun event, The Green Sleeves Fashion show. The weather was a bit nippy for Atlanta. My daughter grabbed my camera and was front and center to get these shots of the runway.

Shannon Mulkey of Patina did a collection using drop clothes. The neutral fabric of the dresses allowed for their classic designs and couture style waists line details to delight you. I felt they were the perfect compliment to what truly took front and center, her extraordinary zipper accessories and elaborate neck cuff. Our images do not do them justice, they are wow!!

Another highlight from the evening was the "trash" puppets made from Tangled Tentacle Puppets of Atlanta. If you think they look like fun, you should contact the gallery as they have NO info about them on their website whitespace.

What are you Thankful For?


Working the Window @ VSA

Last week I got to sit in a window @ the VSA Gallery for 4 hours and make ornaments. Lots of folks stopped to watch. Good Fun was had by all.

Sloth Craft @ ICE


Wow ICE was a blast. The place was hopping all day long. The soda can ornaments were a huge hit. My nephew came along for the ride and found some gifts, mostly for himself. I slept for a couple of days to recover.

E*L Sapo's 11th Annual Holiday Artist Market


Handcrafted Artful Gifts from over 25 local artists!
folk art to fine art and everything in between

Opening Party Wed, Dec. 2, 2009 (6pm - 8pm)
Thur, Dec. 3 (10am - 5pm)
Fri, Dec. 4 (10am - 4pm)
Sat, Dec. 5 (10am - 4pm)
Sun, Dec. 6 (1pm - 4pm)


I have all of Thanksgiving Holiday to power up on crafty goodness.

Madly Preparing for ICE


The 2009 Holiday Shopping Spectacular will be November 21st at Ambient Plus Studio. 100 vendors!

See us in booth 10!! ICE ROCKS

Talk of Alabama


The Naked Art Gallery's Veronique Vanblaere showcases few unique gifts for the holidays.
Three Sloth Craft ornaments are in the video clip.

Craftland Show 2009

Just boxed up my work to send off to Craftland.


Craftland Show is an annual holiday sale in downtown Providence, RI that celebrates all kinds of sparkly handmade objects and the people who make them.


DATES: December 4 - 31
HOURS: Seven days a week 10am - 6pm
Open late: Thursdays and Saturdays 10am - 8pm

LOCATION: 235 Westminster St Providence RI 02903
CONTACT: 401.272.4285 or info@craftlandshow.com

Check out their blog for our exciting news, artist interviews, updates and more!

Spruill Holiday Market


Get Ready
Get Set
GO!!!!
Let the holiday shopping commence. This Wednesday is the sneak peak for the Spruill Artist Market. Lots o Sloth Craft Ornaments and a bunch of other cool artists.

Collage Necklace Redone


I originally saw this on the wonderful and inspiring Threadbangers program and thought it would be a cool use of the new Honey Buns from Moda. Yea howdy it worked great. Since the rolls are already 1.5 x WOF there is no prep work. Here how I did it.


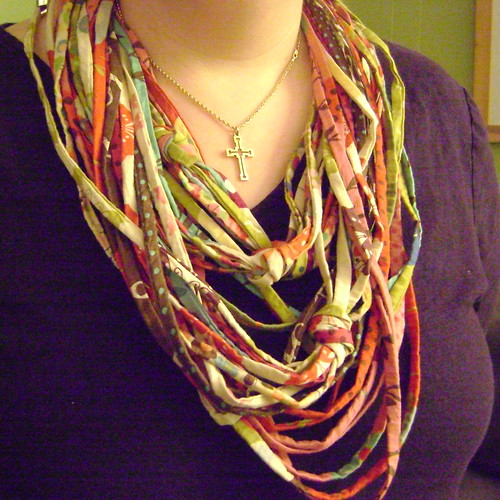
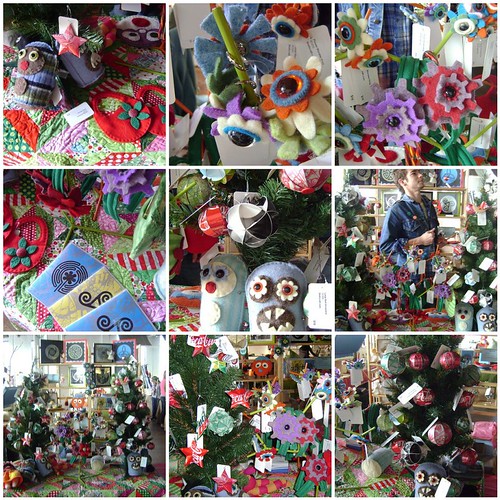
Fun & Fast way to adorn yourself with one of the cool new Honey Buns from Moda.

Originally aired on ThreadBangers.com

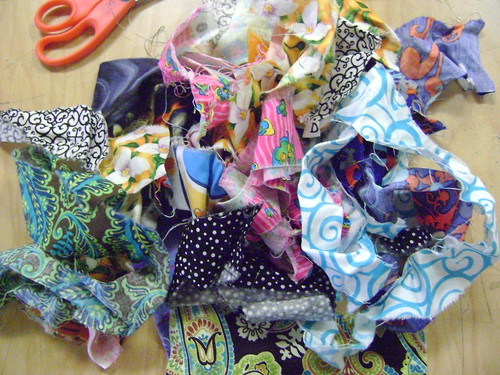
1. Pick a cool new Honey Bun (1.5 inch stripe x WOF)
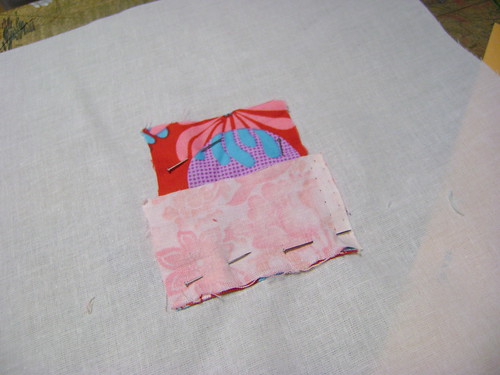
2. Fold strips in half and stitch ¼ inch from the fold. (save at least one)
3. Trim raw edge to within 1/8th inch from stitch line.
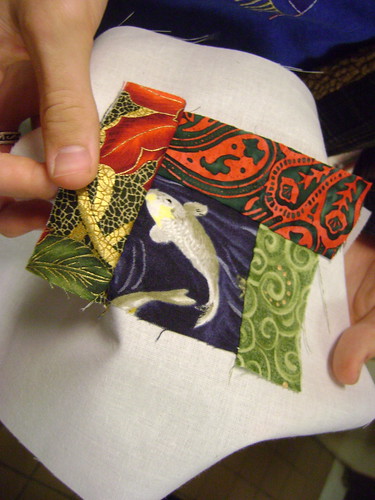
4. Use a bobkin or safety pin to turn the tube.
5. Stitch all of the selvage tube ends together (use a denim needle) Sew Slowly. Trim ends to even.
6. Cut some of the tubes shorter or knot them.
7. Line all of the other tub ends together and stitch slowly.
8. Trim ends to even.
9. Lay one side over the top of the other to form a circle and sew down.

THIS IS VERY THICK AND WILL BREAK YOUR NEEDLE IF YOU DON’T SEW SLOWLY.

10. Take the saved strip and wrap it around the raw sewn edges.
11. Stitch down.
12. Slip it over your head and sport a cool new fabric necklace.


Here is my inspiration the Thread Banger Episode. WELL the video appears to be compromised. Here is a link

String Quilt Tutorial


Are you familiar with the amazing quilts done in Gee's Bend Alabama? My students and I studied the work of these creative and industrious women; discussing their motivation, their utilitarian quilts, and their fame, ultimately the quilts ended up in museums across the county.

Then I taught them to sew. Keeping with the theme of reuse, I brought my students all of the first rips that I save when I square up a fabric.

Most of the kids had never sewed. I decided we would create a string pieced log cabin styled block on a muslin foundation. Pretty easy and if their stitches got a bit too big the foundation would sturdy it all up.

  • Start with a center block and a second piece that is the same length as one side.
  • Lay the bottom piece RS up on the foundation and then lay the top piece RST, aligned on one edge, see the tiny sliver of the bottom piece peeking out.
  • Sew approx where I stuck the pins in. Instead of harping on the quarter inch, I told the students to measure the seam with the nail of their pinkie finger, which is usually approx 1/4 inch (except for the really big boys, they made a jig to measure with).
  • Flip open the first seam and press, then add the third piece , which should be long enough to catch the raw edges of the first two pieces. (Notice my students used the selvage, I told them to remove it but most missed that part).
  • Flip open the third pieces and press.
  • Add a fourth and continue around the block until you reach the edge of the foundation piece.


Here are a few of the finished blocks. One student even tried a triangle. I am so proud. They will ultimately make a large pillow with four blocks or a small quilt. If you look too close you might see a raw edge that did not get completely sewn down, no worries they will also learn the fine art of raw edge applique, yo yos and always, we can fix it when we quilt it. I love this project!

Fall 09 Fabric Festival


Well the weather outside was frightful, but the deals were so delightful.

Thanks to all of you who braved the rain and cold to make our 4th Annual Fall into Fabric Festival a huge success.

Thanks to my girls for stepping up and adding the third generation of worker bees. Another year or two and I can retire and let them take over, right?

Thanks to my moms (Joyce & my other mother Barbara) who got here from Blue Ridge faster than they did from my MIL's house (only 9 miles away). The scenic tour included Acworth and historic Roswell. I know from my childhood that my mom can get you there but she can't always get you back.

November's month long birthday celebration will commence shortly so join our newsletter or follow us on Twitter so you can be the "First to Know"

Fruit Leather Tutorial


1. Slice up Apples or other fruit, add 1/2 cup water and place in a large pot. *


2. Usa a pot with a tight lid. *


3. Set you stove to LOW. *


4. Cook until soft, use a fork to check tenderness and to aid in mashing the fruit. *


5. Keep cooking until fruit disintergrates. *


6. Set up your food mill. If you don't have food mill you will need to do more prep work, peeling and seeding fruit. *


7. Most food mills need a bowl to catch the peelings and the seeds and a bowl to catch the puree. *


8. Slowly spoon the hot fruit into the hooper of the food mill. *


9. Return puree to your pot (add the seeds and peelings to your compose pile). Add about 1/2 -1 cup of sweetener (personal choice but even a little sugar will vastly sweeten the fruit leather). I was working with about 8 cups of puree. Cook on LOW for another half hour. *


10. Allow the fruit puree to cool slightly. Cover your dehydrator tray with plastic wrap, parchment paper or a teflon sheet. *


11. Spoon fruit puree onto the covered sheet. *


12. Smooth the fruit puree out until it is approx 1/8 inch thick. I drop the pan lightly to help smooth out the puree. *


13. Put the puree into your dehydrator, start checking after 4 hours. If you don't have a dehydratoy you can use your oven (plastic wrap will melt, protect the pan with teflon or parchment) on the lowest heat or if you have a gas oven you might just be able to leave it in the oven overnight. *


14. Fruit leather is done when the top is firm but slightly tacky. Use a pizza cutter or clean scissors to make strips. Roll the strips up so you can slide them more easily into snack containers. Store in an airtight container. *


This tutorial is a bit late in the making. This fruit leather has been eaten and more has been made since.


* Image Details.

Naked Art Kitchmas


Looky Looky, One of our Sloth Craft's ornaments is on the Naked Art Postcard for their holiday Kitchmas show.

Recycled Pop Can Skull Earrings


Nothing like being timely. This die came in last week. So this weekend during our playdate Miss Shannon from Patina showed me how to make the skulls into earrings. Perfect for Christmas, right??

Creative Reuse


Okay I have been crowing about this since I found out, not an attractive attribute I know.

Now my copy of the book has arrived, it is chock full of amazing stuff and I am really proud. I am honored my work was accepted into this over the top amazing publication.


These images are the very first ornaments I made last year as gifts, the birth of Sloth Craft.

These crazy little guys are snittens, I started making them last year from mittens.

The book is available from Amazon and although it is not officially out until November 1, I already received mine.

You will love the book if you are a crafter, cause it is full of beautiful things to look at, aspire to immulate, or to find online to purchase.

You will love this book if you are an environmentalist cause it is drop your jaw amazing what folks can create with a bit of odds and ends!

Simple Pin Cushion


Today I taught 30 + teenagers to made this pincushion by hand. They seemed to like it, those that tried. These could be used for almost anything, bean bag, sachet, etc. all depending on what you stuff it with.


1. Start with one square of fabric.*
2. Fold in half RST, Sew down both short edges.*
3. Open.*
4. Pin RST at the seams.*
5. Leave a GAP. DETAIL.*
6. Sew down long seam, stop leave a gap, sew to the edge.*
7. Turn and push out corners.*
8. Stuff.*
9. Use a ladder stitch to close the gap.*
10. Add an embellishment.*
11. Maybe a Wool Butterfly.*
12. Maybe a Wool Flower.*

We started with a 6.5 inch square. I can think of hundreds of ways to fancy this up. It took me about 5 minuted to make this on machine, it took most of my students 90 minutes to make it by hand, some of them had never even threaded a needle.

* Link Image Detail

Fall 09 Fabric Fest


It is that time of year! Our annual fall fabric blowout sale! Saturday, October 31 from 9 AM - 2 PM

What you'll find:

Over 2000 pre cut items: fat quarters ($1.00), charm packs ($6.00) and one yard cuts ($3.00).

Over 300 bolts of fabric.
All quilt cotton is $4.00 a yard.

This is our biggest local event and you don't want to miss the great deals.

Here is a link to the sale Flyer!

Sugar Skull Paper Banner


Well it was time!
I wanted to update the family room to celebrate the season: new paper die cut window treatment and a new banner for the mantel.


The window treatment was originally done 2 summers ago and I keep changing out the paper die cuts to fit my mood or the season. This is the original blog entry with instructions.

The mantel banner is a new idea, the sugar skulls are so easy to string horizontally. You just slide the string through the existing decorations in the forehead.


Look like we are almost ready for the wicked.

Wool Covered Buttons


I buy a lot of wool sweaters for my projects and not all of them felt as nicely as I want. The sweaters are already cut up before I wash them so there is no wearing them or re thrifting them.

SEW!!! I decided to try covering buttons with the not quite felted wool. I ordered my button blanks from Atlanta Thread & Supply Company. They are open to the public. They sell in bulk with no real packaging (also great place for zippers) with excellent prices. The buttons come with two parts: a front domes cap and a flat back with the letters PRYM. You don't need any additional tools, other than scissors (if you don't have e die cutter with a circle die).


Cut out the correct size circles for your buttons, mine are 1.5 inches.


Center the metal top on the fabric.


Gently push the fabric onto the prongs inside the button cap. Push in one side then the opposite side, all around evenly. There are more images up at flickr.

Back Cap


Carefully snap the backing piece onto the front cap. Once this is done it is very hard to get undone so make sure all of your fabric is neatly pushed into the cap.

Pretty covered button.


Hairband with wool covered button.

Wool Gift Bag Ornament


I kinda love these new gift bags but I am quickly becoming aware aware that I like the design part....

AND not the lets make 30 of these to mail out to various shops & shows the first of November.

Kinda having a YIKES week!

I did complete the headband goal for today.

Many Faces of the Poly Ball

This week I have been looking for and making more Polyhedron Balls out of found recycled materials, Romance Covers, Album Covers & Atlas Books. I love the ones from the paper I made but I don't have time to make another batch of paper (I Keep Saying, maybe I should just go out to the garage and crank up the Critter). So this past week has found me at thrift store and book sales looking for cool new thin cardboard for the ball.


1. Recycled Fabric Paper, 2. Billy Squier Album Poly Ball, 3. Romance Novel Poly Ball, 4. Photo Ball, 5. Recycled Fabric Paper, 6. Atlas Poly Ball

Last night at KraftsWorks these were a huge hit to pick up and marvel, unfortunately I had as many at the end of the night as at the beginning. I did not hang them on a tree but left them in a bowl that truly looked super wonderful, perfect for every hip house on the block.

Many of these balls will only be available at the upcoming local shows since they are very much one of a kind. Keep an eye out for them!

Sugar Skulls Banners


Sugar Skulls Banners
Originally uploaded by SomeArtFabric
Making these for Kraft Works at Young Blood Gallery this Thursday.

Help Hospitalized Veterans

On Sunday my father had a mild stroke. My dad lost most of the use in his right arm, he was tilting wildly to one side, he could walk with help. He had forgotten how to use a spoon and could not sign any of the paperwork.

BUT while spending quality time at the VA hospital I discovered a cool new organization, Help Hospitalized Veterans. HHV comes around and gives out free craft kits that are donated to them to keep the vets engaged while they are incapacitated. The web site indicates that they do a great deal more than just craft kits. I was impressed.


My dad decided that he would start his own occupational therapy using the Moccasin Kit they provided. He struggled with the instruction but once I helped get the two pieced together and the first stitches in, he was off. This is the man who started me down the wicked way of sewing. I was thrilled to see that he could thread the lace through the holes and line them up correctly. What an amazing physical recovery.

Physically he is vastly improved, in good spirits, feeling pretty okay. He completely flunked his cognitive tests yesterday, he could name all of the Presidents in order backwards, but he cannot recall certain words and he lost numbers in a very big way.


I am very impressed with the VA, I think they are doing a great job with my dad. They are very supportive of the family and his aftercare, which is great since I will be in charge of most of what happens after he leaves the hospital.

Wonky Wool


Between being sick last week and sitting with my dad at the hospital this week there has been a lot of enforced down time which is the perfect time to get some sewing done.

I love to make plushies, my favorite part is the face so I elimated the body and just did the face as a wool Trivet. I am a bit OCD about trivets right.

Looking for Love

In the way of people to purchase your handmade stuff. Here are some shows (mostly local Atlanta) with deadlines NOW.

Consignment Shows
September 1 --
Mable House and South Cobb Arts Alliance
Christmas House
This is a direct link to the application, which is kinda buried in their site. The deadline was Monday but I have it on good authority that they will continue to accept applications for judging until they reach capacity or they hit the jury deadline (9-15)

September 4 -- VSA Art of Georgia Holiday Art Sale This is a very long sale and I am not familiar with it but I think it looks like a good organization.
The Call
VSA arts of Georgia seeks artists with and without disabilities to participate in our 2009 Holiday Art Sale. The sale is an opportunity to sell your work in a prime retail location in Downtown Atlanta at the height of the shopping year. The sale is one of two annual fundraising events for the organization; our mission is to provide access to the arts for Georgians with disabilities and with low income.

Tent Shows

Candler Park Fall Festival

Fall in the 4th
Athens Indie Craftstravaganzaa - Their app is not up yet so check back

The best of all shows locally!!!
Indie Craft Experience


National Shows

Renegade Craft Fair

Bazaar Bizarre

This is a very small list and I am sure there are more out there so feel free to leave other shows in the comments.

Wicked Wool


I started getting ready for holiday shows and I pulled out the wool sweaters this weekend. I was dismayed to find that many of them were not neatly folded in boxes as I (cue the dream music) remembered, they were wadded into boxes. Now they are wrinkled and need to be pressed (or rewashed).

Under the direction of the EXTREME wool goddess Betz White (her blog not her personally), when I felted a sweater I cut off the sleeves and then cut the sleeve down the seam. Well in these boxes I have wadded sweater bodies and even more wadded sleeves. This obviously is not a very workable method for me and the boxes make finding the color I needed almost impossible.

THIS year I am slicing the sweaters open a bit differently, to eliminate the loose sleeves I am slicing them up the side seam, through the armpit and down the sleeve. So far I am please with the amount of workable felt.

This new method of cutting the sweaters open allows me to hang them effectively. So I purchased a wood closet pole and put it on the existing shelves in my sewing room. I used shirt hangers for most of my sweaters, on the miscellaneous sleeves I used skirt hangers.

Cause I now could
, I color coordinated them and realized I have a lot of red and turquoise and only one blue. I am please with the final results but realize I need another pole for the yet to be felted ones. Wonder if hubby would give up some of his closet space.

LinkWithin

Related Posts with Thumbnails