I am not a fan of grump posts but if I don't share this info about eating at Universal Studios, well other folk with Gluten sensitivities will be as clueless as I when they visit the park.
To preface this post, two years ago we went to three of the many Disney parks, we purchased the meal plan and loved it! When you purchase a Disney meal plan they ask you about food allergies. While at the park you carry a magnetic card with all of your info, at each restaurant they swipe your card and THEN the chef comes out to talk to you about what is Gluten Free and (in our case) Dairy Free and what can be prepared GF DF. AMAZING! They even had GF brownies for dessert and soy ice cream. At the pop stands they were aware of your allergies and at one stand they ran out of GF brownies and an employee went to another location to get one for my daughter. So WOW and way to go to Disney Parks' customer service for folks with food allergies.
Back to this weekends trip to Islands of Adventure at Universal.

Sharing my thoughts on sewing, crafting, recycling and life as someone who makes stuff (mostly messy stuff).
Showing posts with label Food. Show all posts
Showing posts with label Food. Show all posts


Babycakes Mini Muffins
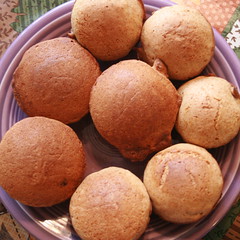
So this morning I sat down to create a gluten free recipe that would make about 2 batches, which is perfect cause the first batch get gobbled up as soon as it is cool enough to eat and than the next batch is ready by the time you have eaten the first.
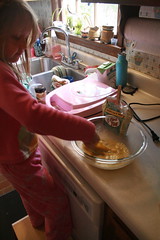
Gluten Free Babycakes Fruit Muffins
Makes Approx 16 mini muffins
1 Egg
1/3 - 3/4 cup rice milk (start with 1/3 cup add more if needed after mixing in dry ingredients for good pouring consistency)
1 tsp vanilla
1 Frozen banana thawed and mashed or 1/2 cup Apple Sauce or 1/2 cup Fruit Preserves
6 shakes of Cinnamon
1/3 cup sugar (if you used perserves you may not need any additional sugar)
1 cup Bob's Red Mill Gluten Free Pancake Mix (this is what we had on hand, the mix is good cause it already has Baking Soda and Xanthan Gum in it)
Whisk together all of the liquid ingredients before adding dry ingredients (start with 1/3 cup milk add more if needed after you finish mixing in the dry ingredients to create a good pourable consistency or to extend the batter to get 2 batches).
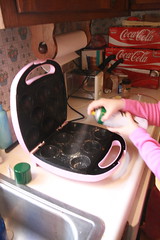
Use spray oil on the muffin maker, the machine is non stick, our first batch stuck a little. We use a half cup measuring cup to pour the batter into the wells. DO NOT OVER FILL, the lid will come down and make a super big mess. I try to get A to under fill.We are still practicing.
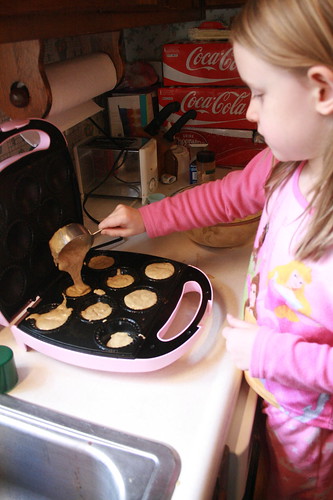
Close the lid and set a timer for 9 minutes. Check to make sure they are done, Carefully use a spoon to remove the muffin, both the muffins and the maker are HOT.
Spray the oil on the maker and refill for another batch. Gobble down the first batch.
Go off and play, expect mommy to finish up.
In my experience, Gluten Free breads are good for the first day, then they get weird, moist gooey or super dry. So the Babycakes may be wonderful, it is easy to wipe down and it makes just enough to enjoy with no leftovers.

Yum Yum Yummy
I am not a baker, my sole purpose in the kitchen is to make coffee. Yesterday I decided I needed to step to it if I wanted any Gluten Free, Lactose Free yummy treats for the holiday.
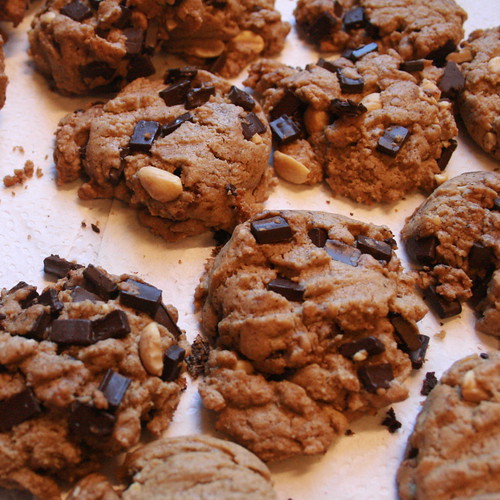
Thanks to Dot at Food Whirl's twitter messages there was an amazing cookies recipe, originally posted at Delicious Delicious Delicious. The Chocolate, Cinnamon and Peanut Butter Cookies recipe is NOT gluten free, I subbed in Bob's Red Mill Gluten Free Baking Flour and dark chocolate chunks. The dough was super stiff and did not bubble up and melt flat like wheat cookies. Next batch I will probably add an extra egg and more baking soda. If I have it in the fridge I will add some Xanthan Gum, which is supposed to help make gluten free flour less absorbent or something (it is in all the GF bread recipes). The cookies taste great and look good but they are a bit heavy.
PIE!
What is a holiday without Pie! My children informed me that they prefer Pumpkin Pie to Pecan Pie. FOOLS! I made both.
I used a the Gluten Free ready made crust from Whole Foods, these crusts are not dairy free. The crusts have butter, which does not seem to bother my daughter (butter should have very little lactose if properly made), very good cause I am no crust maker.
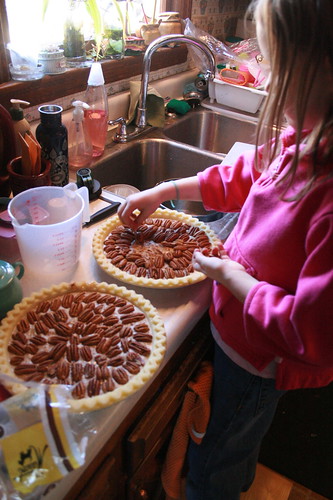
Dairy Free Pecan Pie recipe came from Dairy Free Cooking, this recipe does not use corn syrup, just brown sugar. Pick you poison I guess. My mom gave us whole pecans in our holiday gift bag, so Arabella took the time to make mandala style designs on the top of the pecan pie. I followed the recipe, the only sub I made was to use tinned Coconut milk for the soy milk and the margarine and GF Flour. The top of the pie crusted beautifully before the middle was done, I hovered a bit to make sure the crust did not burn.
Dairy Free Pumpkin Pie recipe came from Food.com. This is a pretty basic recipe, I subbed in tinned Coconut Milk for the liquid part. I think it could use a bit more sugar, it almost taste healthy and maybe more spice. The crust did get a little too brown by the time the center was done, I should have lowered the temp to 350, I think 400 was too hot.
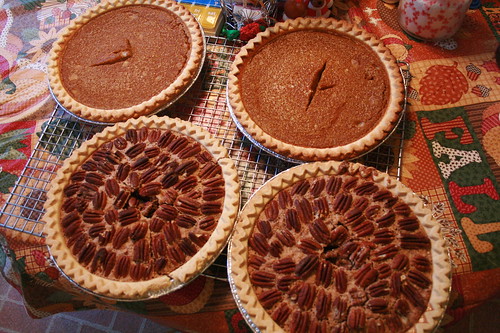
Hopefully there will be pie to bring to my dad's house tomorrow, last night we had pie for dinner. PIE is healthy, I went through a dozen eggs yesterday and nuts and coconut milk and beta carotene. All very good for you. Hubby asked if we had any veggies yesterday, only if baked beans count. Yeah for the holidays and yeah for yummy food.
Thanks to Dot at Food Whirl's twitter messages there was an amazing cookies recipe, originally posted at Delicious Delicious Delicious. The Chocolate, Cinnamon and Peanut Butter Cookies recipe is NOT gluten free, I subbed in Bob's Red Mill Gluten Free Baking Flour and dark chocolate chunks. The dough was super stiff and did not bubble up and melt flat like wheat cookies. Next batch I will probably add an extra egg and more baking soda. If I have it in the fridge I will add some Xanthan Gum, which is supposed to help make gluten free flour less absorbent or something (it is in all the GF bread recipes). The cookies taste great and look good but they are a bit heavy.
PIE!
What is a holiday without Pie! My children informed me that they prefer Pumpkin Pie to Pecan Pie. FOOLS! I made both.
I used a the Gluten Free ready made crust from Whole Foods, these crusts are not dairy free. The crusts have butter, which does not seem to bother my daughter (butter should have very little lactose if properly made), very good cause I am no crust maker.
Dairy Free Pecan Pie recipe came from Dairy Free Cooking, this recipe does not use corn syrup, just brown sugar. Pick you poison I guess. My mom gave us whole pecans in our holiday gift bag, so Arabella took the time to make mandala style designs on the top of the pecan pie. I followed the recipe, the only sub I made was to use tinned Coconut milk for the soy milk and the margarine and GF Flour. The top of the pie crusted beautifully before the middle was done, I hovered a bit to make sure the crust did not burn.
Dairy Free Pumpkin Pie recipe came from Food.com. This is a pretty basic recipe, I subbed in tinned Coconut Milk for the liquid part. I think it could use a bit more sugar, it almost taste healthy and maybe more spice. The crust did get a little too brown by the time the center was done, I should have lowered the temp to 350, I think 400 was too hot.
Hopefully there will be pie to bring to my dad's house tomorrow, last night we had pie for dinner. PIE is healthy, I went through a dozen eggs yesterday and nuts and coconut milk and beta carotene. All very good for you. Hubby asked if we had any veggies yesterday, only if baked beans count. Yeah for the holidays and yeah for yummy food.
Egg Muffins, Yum!
Thought I would share our favorite breakfast with you! The girls love this and it is fast enough to happen on a school day, requires almost no prep and the leftovers are a hit for snack or another breakfast.

Ingredients:
Organic Free Range Eggs (we use the whole dozen)
Gluten Free Pre Cooked Sausage (We Like Wellshire Maple Pork) or Lunch Meat
Spray oil
Muffin Tin
Fork
Small Bowl, If you don't like eggs with visible yokes.
Prep:
Spray your muffin pan with a spray oil. This helps keep the eggs from sticking to the pan and make cleanup a breeze.
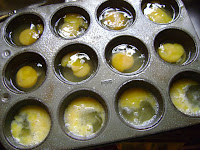 Crack one egg and deposit the egg into one muffin compartment (is there a better term for that?). I break the yoke with a folk. If you don't want the yoke to be so evident then crack the egg in a bowl and give it a good mix with the fork first (sometimes the eggs that are more mixed will stick a bit to the muffin pan). That is what I did on the bottom row of eggs.
 Slice half of a sausage link in with each egg, gently press down so that the egg covers the link.
OR add whatever good stuff you like with eggs: peppers, cheese, salsa. Press gently into the egg.
Cook at 350˚for approx. 20 minutes. This is a personal decision. The girls like runny eggs so I will occasionally pull it from the oven after 15 minutes. If I know we are eating at home.
 Serve up or if you are late for school tell them they can eat them in the car. After the egg muffins are cool, I put them in the fridge for another breakfast or snack.
Why do I love these so much!

Ingredients:
Organic Free Range Eggs (we use the whole dozen)
Gluten Free Pre Cooked Sausage (We Like Wellshire Maple Pork) or Lunch Meat
Spray oil
Muffin Tin
Fork
Small Bowl, If you don't like eggs with visible yokes.
Prep:
- Night Before: Pull the sausage out of the freezer and pop it in the fridge.
- Morning of: If you are using lunch meat or want to add peppers or cheese dice it up into small chunks.
- Set Oven to 350


Spray your muffin pan with a spray oil. This helps keep the eggs from sticking to the pan and make cleanup a breeze.


OR add whatever good stuff you like with eggs: peppers, cheese, salsa. Press gently into the egg.
Cook at 350˚for approx. 20 minutes. This is a personal decision. The girls like runny eggs so I will occasionally pull it from the oven after 15 minutes. If I know we are eating at home.

Why do I love these so much!
- The pan is usually easy to clean up, more so than my cast iron after making eggs.
- I can walk away from the eggs once they are in the oven, which makes for a great breakfast that I don't have to hover over.
- It is already in serving sized bits.
- It is not messy to eat with your hands (if needed).
- The girls love it!
- Oh, and it is a power packed protein meal that sticks a bit better than toast.
Good Ferments Explode
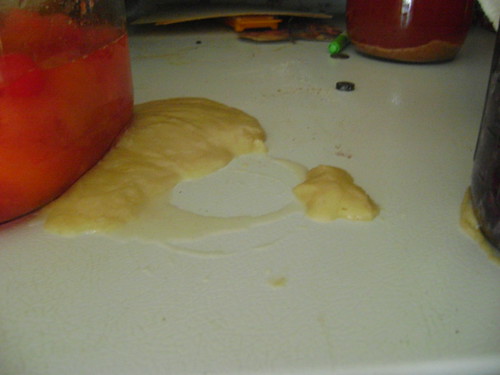 This morning, I went to check on my ferments and there was a MESS.
Yesterday I added more flour, sugar, soda starter to my gluten free kinda Amish Bread starter. Some time during the night it oozed out of the loosely closed jar.
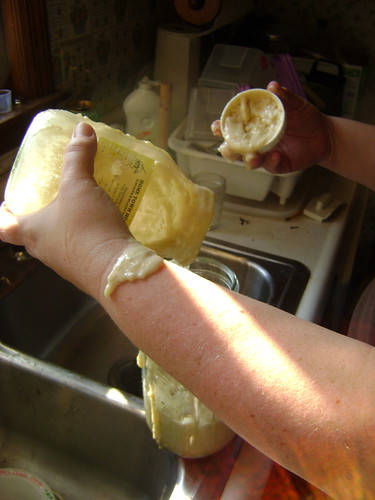
When I opened the jar this morning to pour it into a larger jar it EXPLODED!
It ended up everywhere. All over me, the floor. I am sure to find it for days.
The dough starter, which is one cup gluten free flour mix, one cup ginger soda stater, one cup sugar, has some kick.
Not sure how it will work when I bake with it but should be fun. I added another one cup of all after I moved it into a larger container. I will try to make a cake with it tomorrow.


Food Allergies & Fermented Foods

So fast forward my life, married with kids, and in charge of feeding and watering, but there is a glitch, my youngest is allergic to milk and wheat (Dairy Free/Gluten Free are we!) and apparently so am I. I was not before I had Arabella, I ate bread and cheese all the time, was I tired, cranky, yes probably but many would say I still am, so how did I become "allergic" after I had my second child. Here is the story:
Fermentation Insanity
I have gone off the deep end. When I do things I tend to go overboard but this is a fun crazy new level, even for me.
 A few weeks ago I went to Tennessee to see what I could see about eating real food. Well, I came back with a Jun scoby (fancy kombucha scoby) and some just started Mead. Today behold the top of my refrigerator.
It is crazy fun that maybe only I will eat.
From L-R:
Ginger Soda Starter
Blueberry - Cherry Soda (Day 1)
Kombucha
Mead
That is the first row anyway.
A few weeks ago I went to Tennessee to see what I could see about eating real food. Well, I came back with a Jun scoby (fancy kombucha scoby) and some just started Mead. Today behold the top of my refrigerator.It is crazy fun that maybe only I will eat.
From L-R:
Ginger Soda Starter
Blueberry - Cherry Soda (Day 1)
Kombucha
Mead
That is the first row anyway.
Making Hooch in a Hotel
Okay, I am not actually making hooch. I am making Jun, which, I think, is just fancy Kombucha. I received a mother scoby two weeks ago at the Food for Life event at Sequatchie Valley Institute. As soon as I got home I made a batch of strong Green Tea & added honey. I let the brew sit overnight so that the chlorine would dissipate from the tap water. The next morning I carefully placed the scoby into the room temperature tea / honey mix and thus started my first batch of Jun. I was told that this mother scoby was different from a kombucha mother scoby because it needed honey for food and not white sugar. I can't really speak to that, this is my second experiment in fermented beverage (first is the mead we also made that weekend).
Anywho, I left for the Quilt Symposium of Alabama in Cullman three days later, leaving the Jun to do whatever it did. I arrived home on Sunday, kissed the kids and checked the hooch (the mead and the Jun). The mead looked good, the Jun scoby, which was floating peacefully on the top when I left, was all kattywampus. My beloved stirred the wrong concoction. Oh NO!!!
No fear! I would see what the Jun tasted like after a week and start a new batch. I was happy to discover that even thought the Jun had a rough week, the mother scoby created a daughter scoby and the mixture had a sweetish fermented / vinegary smell. Using CLEAN hands I scooped out the scoby and placed it in a clean container, decanted about 80% of the Jun into another clean plastic container and put it in the fridge.
 Drum Roll Please!!!
After chilling the Jun for a few hours we had a taste test. And the results are:
Daddy - Yum!
Red 1 - Supper Yum, makes her feel as good as an hour of Yoga. Drama much!
Red 2 - Yuck!
Mommy - Hmm... This taste like really tart unsweetened carbonated tea, not sure I can swing it with out some juice mixed in.
From what I have read and what I was told this mixture could be carbonated (ours was), should still be kinda sweet after only a week (ours was not) and should have a very low alcohol level (did not perceive any alcohol reaction).
So you might want to know where I came up with the title of this entry. Well, I am getting there.
Double fermentation, I read an interesting article at Food Renegade that had you pouring some fruit juice into a mason jar, adding your kombucha and closing up the jar for another 48 hours. I figured it might be better for me than adding straight up sugar to the Jun and it should work cause I kinda think that Jun & kombucha are the same basic process. Using a mason jar, I added a cup of Cherry juice and then filled the the jar with Jun. Then I tossed it in the car and drove it to Ohio for a quilt show. My mason jar full of Cherry Jun got an odd reaction from my other mother and super quilt helper. She smelled it and tasted it and promptly decided I was brewing hooch. If you have consumed homemade kombucha or made it yourself you know that once you separate from its mother it get lonely and grews a new mother. Not really, it just continues to do whatever fermenting it was already doing and a scum forms on the top that will become a new mother. Still not a darling image.
How is it that I am fermenting Jun in my hotel room? I had a glass of Jun the first day, on the second day I realized that I would run out of Jun before I returned home to my stash, I mean the new Jun I started before I left. What to do, go without?? Well I have only been drinking it for 3 days so it would not be a super tragedy. OR I could go to the free breakfast buffet and make a cup of super strong green tea and get a glass of cranberry juice (which might have been a bad choice cause I think cranberries are antiseptic) and add it to my mason jar of hooch, I mean Jun.
So we got home from the quilt show this evening and I checked on my Jun, it is well on it way to making a new mother and it is very carbonated. I will check it in the morning and see if it is palatable.
Just for the record, I think I am actually just making carbonated juice and it probably has very few of the esteemed and oft lauded wonders of the miraculous kombucha (maybe aka) Jun.
Anywho, I left for the Quilt Symposium of Alabama in Cullman three days later, leaving the Jun to do whatever it did. I arrived home on Sunday, kissed the kids and checked the hooch (the mead and the Jun). The mead looked good, the Jun scoby, which was floating peacefully on the top when I left, was all kattywampus. My beloved stirred the wrong concoction. Oh NO!!!
No fear! I would see what the Jun tasted like after a week and start a new batch. I was happy to discover that even thought the Jun had a rough week, the mother scoby created a daughter scoby and the mixture had a sweetish fermented / vinegary smell. Using CLEAN hands I scooped out the scoby and placed it in a clean container, decanted about 80% of the Jun into another clean plastic container and put it in the fridge.
 Drum Roll Please!!!
After chilling the Jun for a few hours we had a taste test. And the results are:
Daddy - Yum!
Red 1 - Supper Yum, makes her feel as good as an hour of Yoga. Drama much!
Red 2 - Yuck!
Mommy - Hmm... This taste like really tart unsweetened carbonated tea, not sure I can swing it with out some juice mixed in.
From what I have read and what I was told this mixture could be carbonated (ours was), should still be kinda sweet after only a week (ours was not) and should have a very low alcohol level (did not perceive any alcohol reaction).
So you might want to know where I came up with the title of this entry. Well, I am getting there.
Double fermentation, I read an interesting article at Food Renegade that had you pouring some fruit juice into a mason jar, adding your kombucha and closing up the jar for another 48 hours. I figured it might be better for me than adding straight up sugar to the Jun and it should work cause I kinda think that Jun & kombucha are the same basic process. Using a mason jar, I added a cup of Cherry juice and then filled the the jar with Jun. Then I tossed it in the car and drove it to Ohio for a quilt show. My mason jar full of Cherry Jun got an odd reaction from my other mother and super quilt helper. She smelled it and tasted it and promptly decided I was brewing hooch. If you have consumed homemade kombucha or made it yourself you know that once you separate from its mother it get lonely and grews a new mother. Not really, it just continues to do whatever fermenting it was already doing and a scum forms on the top that will become a new mother. Still not a darling image.
How is it that I am fermenting Jun in my hotel room? I had a glass of Jun the first day, on the second day I realized that I would run out of Jun before I returned home to my stash, I mean the new Jun I started before I left. What to do, go without?? Well I have only been drinking it for 3 days so it would not be a super tragedy. OR I could go to the free breakfast buffet and make a cup of super strong green tea and get a glass of cranberry juice (which might have been a bad choice cause I think cranberries are antiseptic) and add it to my mason jar of hooch, I mean Jun.
So we got home from the quilt show this evening and I checked on my Jun, it is well on it way to making a new mother and it is very carbonated. I will check it in the morning and see if it is palatable.
Just for the record, I think I am actually just making carbonated juice and it probably has very few of the esteemed and oft lauded wonders of the miraculous kombucha (maybe aka) Jun.
Fruit Leather Tutorial

1. Slice up Apples or other fruit, add 1/2 cup water and place in a large pot. *
2. Usa a pot with a tight lid. *
3. Set you stove to LOW. *
4. Cook until soft, use a fork to check tenderness and to aid in mashing the fruit. *
5. Keep cooking until fruit disintergrates. *
6. Set up your food mill. If you don't have food mill you will need to do more prep work, peeling and seeding fruit. *
7. Most food mills need a bowl to catch the peelings and the seeds and a bowl to catch the puree. *
8. Slowly spoon the hot fruit into the hooper of the food mill. *
9. Return puree to your pot (add the seeds and peelings to your compose pile). Add about 1/2 -1 cup of sweetener (personal choice but even a little sugar will vastly sweeten the fruit leather). I was working with about 8 cups of puree. Cook on LOW for another half hour. *
10. Allow the fruit puree to cool slightly. Cover your dehydrator tray with plastic wrap, parchment paper or a teflon sheet. *
11. Spoon fruit puree onto the covered sheet. *
12. Smooth the fruit puree out until it is approx 1/8 inch thick. I drop the pan lightly to help smooth out the puree. *
13. Put the puree into your dehydrator, start checking after 4 hours. If you don't have a dehydratoy you can use your oven (plastic wrap will melt, protect the pan with teflon or parchment) on the lowest heat or if you have a gas oven you might just be able to leave it in the oven overnight. *
14. Fruit leather is done when the top is firm but slightly tacky. Use a pizza cutter or clean scissors to make strips. Roll the strips up so you can slide them more easily into snack containers. Store in an airtight container. *
This tutorial is a bit late in the making. This fruit leather has been eaten and more has been made since.
* Image Details.
Subscribe to:
Posts (Atom)
LinkWithin
