Fruit Leather Tutorial


1. Slice up Apples or other fruit, add 1/2 cup water and place in a large pot. *


2. Usa a pot with a tight lid. *


3. Set you stove to LOW. *


4. Cook until soft, use a fork to check tenderness and to aid in mashing the fruit. *


5. Keep cooking until fruit disintergrates. *


6. Set up your food mill. If you don't have food mill you will need to do more prep work, peeling and seeding fruit. *


7. Most food mills need a bowl to catch the peelings and the seeds and a bowl to catch the puree. *


8. Slowly spoon the hot fruit into the hooper of the food mill. *


9. Return puree to your pot (add the seeds and peelings to your compose pile). Add about 1/2 -1 cup of sweetener (personal choice but even a little sugar will vastly sweeten the fruit leather). I was working with about 8 cups of puree. Cook on LOW for another half hour. *


10. Allow the fruit puree to cool slightly. Cover your dehydrator tray with plastic wrap, parchment paper or a teflon sheet. *


11. Spoon fruit puree onto the covered sheet. *


12. Smooth the fruit puree out until it is approx 1/8 inch thick. I drop the pan lightly to help smooth out the puree. *


13. Put the puree into your dehydrator, start checking after 4 hours. If you don't have a dehydratoy you can use your oven (plastic wrap will melt, protect the pan with teflon or parchment) on the lowest heat or if you have a gas oven you might just be able to leave it in the oven overnight. *


14. Fruit leather is done when the top is firm but slightly tacky. Use a pizza cutter or clean scissors to make strips. Roll the strips up so you can slide them more easily into snack containers. Store in an airtight container. *


This tutorial is a bit late in the making. This fruit leather has been eaten and more has been made since.


* Image Details.

Naked Art Kitchmas


Looky Looky, One of our Sloth Craft's ornaments is on the Naked Art Postcard for their holiday Kitchmas show.

Recycled Pop Can Skull Earrings


Nothing like being timely. This die came in last week. So this weekend during our playdate Miss Shannon from Patina showed me how to make the skulls into earrings. Perfect for Christmas, right??

Creative Reuse


Okay I have been crowing about this since I found out, not an attractive attribute I know.

Now my copy of the book has arrived, it is chock full of amazing stuff and I am really proud. I am honored my work was accepted into this over the top amazing publication.


These images are the very first ornaments I made last year as gifts, the birth of Sloth Craft.

These crazy little guys are snittens, I started making them last year from mittens.

The book is available from Amazon and although it is not officially out until November 1, I already received mine.

You will love the book if you are a crafter, cause it is full of beautiful things to look at, aspire to immulate, or to find online to purchase.

You will love this book if you are an environmentalist cause it is drop your jaw amazing what folks can create with a bit of odds and ends!

Simple Pin Cushion


Today I taught 30 + teenagers to made this pincushion by hand. They seemed to like it, those that tried. These could be used for almost anything, bean bag, sachet, etc. all depending on what you stuff it with.


1. Start with one square of fabric.*
2. Fold in half RST, Sew down both short edges.*
3. Open.*
4. Pin RST at the seams.*
5. Leave a GAP. DETAIL.*
6. Sew down long seam, stop leave a gap, sew to the edge.*
7. Turn and push out corners.*
8. Stuff.*
9. Use a ladder stitch to close the gap.*
10. Add an embellishment.*
11. Maybe a Wool Butterfly.*
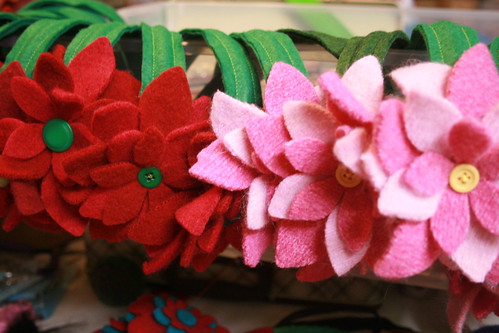
12. Maybe a Wool Flower.*

We started with a 6.5 inch square. I can think of hundreds of ways to fancy this up. It took me about 5 minuted to make this on machine, it took most of my students 90 minutes to make it by hand, some of them had never even threaded a needle.

* Link Image Detail

Fall 09 Fabric Fest


It is that time of year! Our annual fall fabric blowout sale! Saturday, October 31 from 9 AM - 2 PM

What you'll find:

Over 2000 pre cut items: fat quarters ($1.00), charm packs ($6.00) and one yard cuts ($3.00).

Over 300 bolts of fabric.
All quilt cotton is $4.00 a yard.

This is our biggest local event and you don't want to miss the great deals.

Here is a link to the sale Flyer!

Sugar Skull Paper Banner


Well it was time!
I wanted to update the family room to celebrate the season: new paper die cut window treatment and a new banner for the mantel.


The window treatment was originally done 2 summers ago and I keep changing out the paper die cuts to fit my mood or the season. This is the original blog entry with instructions.

The mantel banner is a new idea, the sugar skulls are so easy to string horizontally. You just slide the string through the existing decorations in the forehead.


Look like we are almost ready for the wicked.

Wool Covered Buttons


I buy a lot of wool sweaters for my projects and not all of them felt as nicely as I want. The sweaters are already cut up before I wash them so there is no wearing them or re thrifting them.

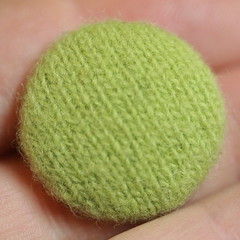
SEW!!! I decided to try covering buttons with the not quite felted wool. I ordered my button blanks from Atlanta Thread & Supply Company. They are open to the public. They sell in bulk with no real packaging (also great place for zippers) with excellent prices. The buttons come with two parts: a front domes cap and a flat back with the letters PRYM. You don't need any additional tools, other than scissors (if you don't have e die cutter with a circle die).


Cut out the correct size circles for your buttons, mine are 1.5 inches.


Center the metal top on the fabric.


Gently push the fabric onto the prongs inside the button cap. Push in one side then the opposite side, all around evenly. There are more images up at flickr.

Back Cap


Carefully snap the backing piece onto the front cap. Once this is done it is very hard to get undone so make sure all of your fabric is neatly pushed into the cap.

Pretty covered button.


Hairband with wool covered button.

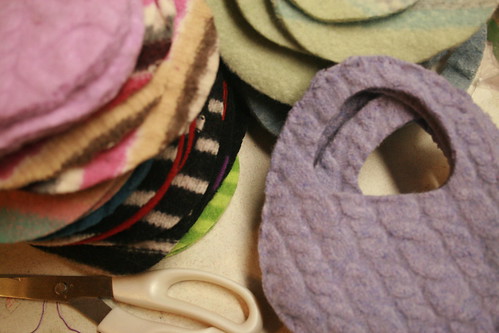
Wool Gift Bag Ornament


I kinda love these new gift bags but I am quickly becoming aware aware that I like the design part....

AND not the lets make 30 of these to mail out to various shops & shows the first of November.

Kinda having a YIKES week!

I did complete the headband goal for today.

Many Faces of the Poly Ball

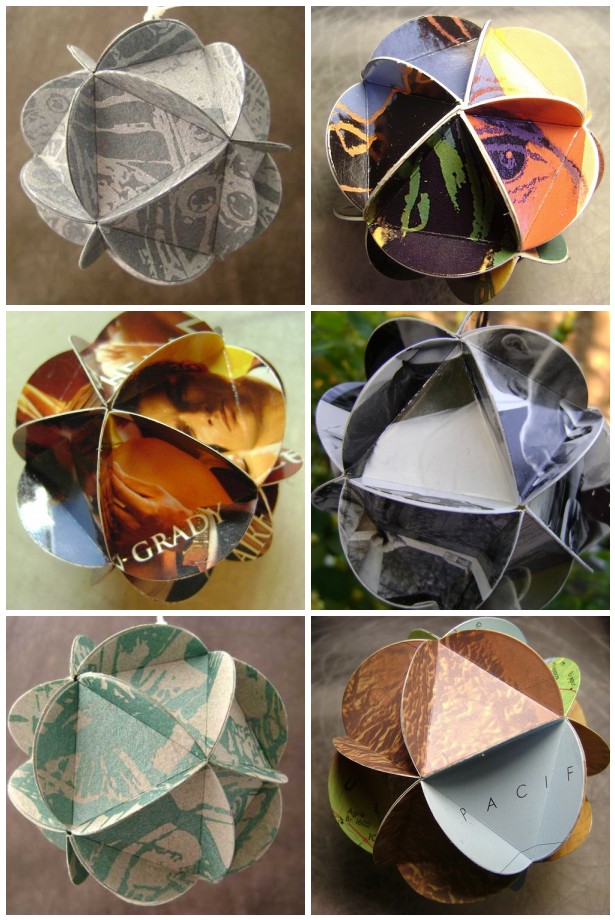
This week I have been looking for and making more Polyhedron Balls out of found recycled materials, Romance Covers, Album Covers & Atlas Books. I love the ones from the paper I made but I don't have time to make another batch of paper (I Keep Saying, maybe I should just go out to the garage and crank up the Critter). So this past week has found me at thrift store and book sales looking for cool new thin cardboard for the ball.


1. Recycled Fabric Paper, 2. Billy Squier Album Poly Ball, 3. Romance Novel Poly Ball, 4. Photo Ball, 5. Recycled Fabric Paper, 6. Atlas Poly Ball

Last night at KraftsWorks these were a huge hit to pick up and marvel, unfortunately I had as many at the end of the night as at the beginning. I did not hang them on a tree but left them in a bowl that truly looked super wonderful, perfect for every hip house on the block.

Many of these balls will only be available at the upcoming local shows since they are very much one of a kind. Keep an eye out for them!

LinkWithin

Related Posts with Thumbnails