What to do? What to make for the super mom in your life? I am not fond of dead flowers, more commonly known as cut flowers. It bothers me that they are chopped off at their prime and stuck in sugar water for my personal enjoyment. If you want to give me vegetation it should have some roots. So to that end, every year I purchase my mom & myself a new (old) antique rose. I usually visit our local nursey
Hastings. If you are in the Metro Atlanta area and have never visited, it is a treat, my kids love it: turtles, fish, parrots and sometime even bunnies along with many hard to find plants. The antique roses are amazing and they thrive with no spraying or extra work. They make me smile for months instead of days. This year after they bloom I am going to try making some rose cutting and
see if I can make more of my antiques roses to share. I have successfully rooted only one rose and it was an important one. I took the cutting from the roadside of 515 near Blue Ridge during one of the many round trips I make 3 years ago during my mom's chemo. This rose has not bloomed yet but it has buds this years and I will share as soon as I have pictures.
Wow, What was this post supposed to be about? Fabric Flowers! Let me get back on topic!
So since I don't give cut flowers and fabric flowers last forever here is how to make some.
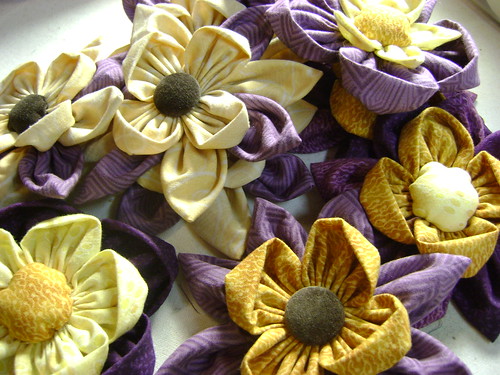
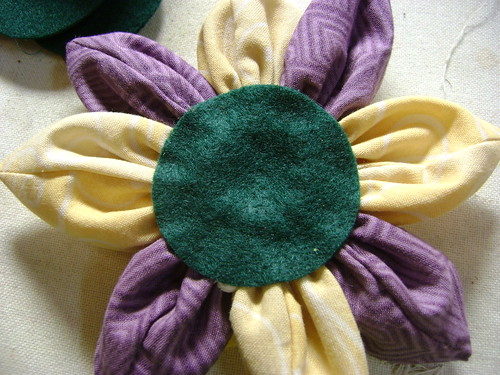
Pick out your favorite (or their favorite) colors. My MIL loves lavender / purple. Cut out some circles.
For each flower you will need
4 large (5.5 inches)
4 medium (4 inches) circles,
1 small (2 inches) circle Brown or Yellow Fabric,
1 small (2 inches) circle Green Felt.
Thread, Glue and a Pin back.
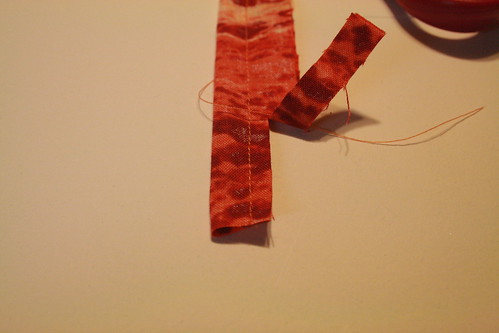
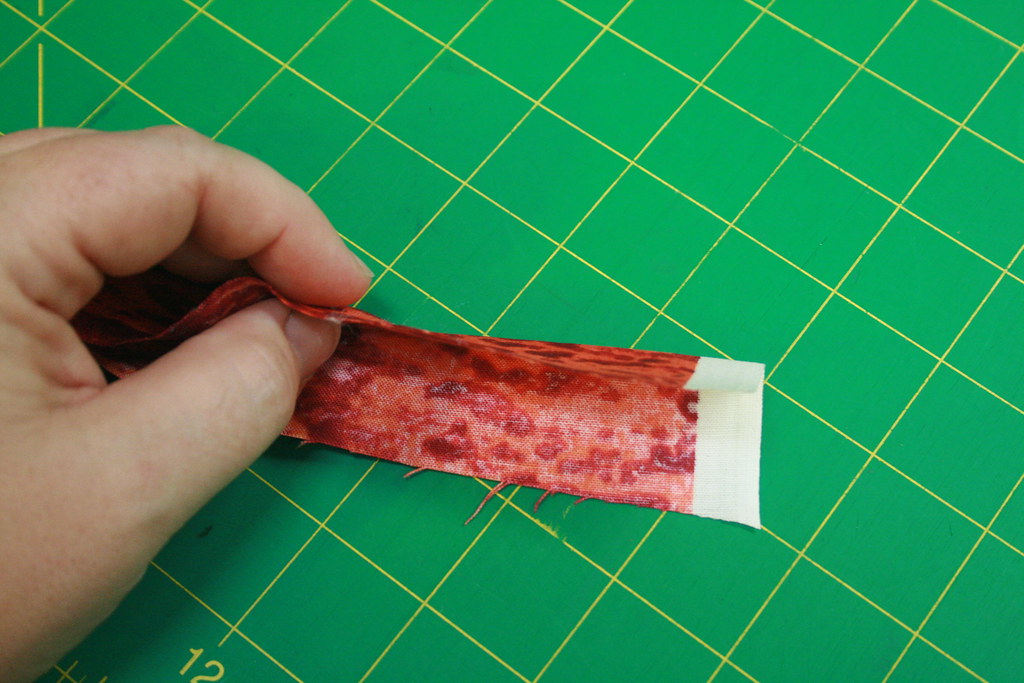
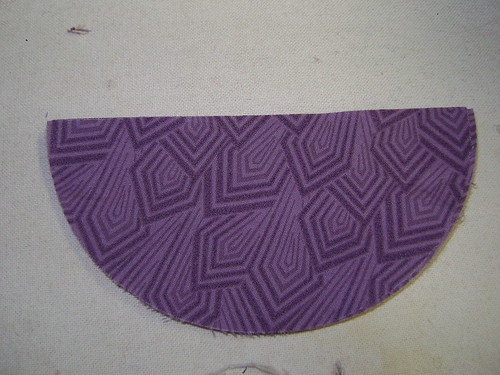
Cut the large (5.5 inch) circles in half. Making 8 half circles.
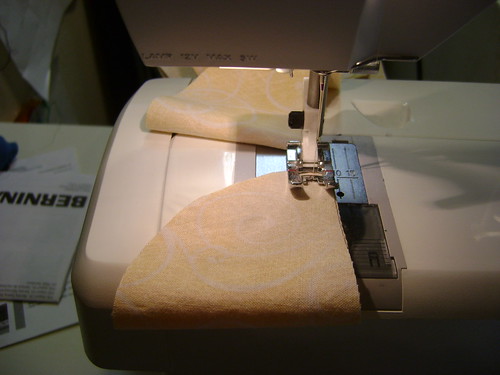
Fold the half circles into quarter circles RST and stitch down the straight edge (1/8 inch seam allowance). Snip apart.
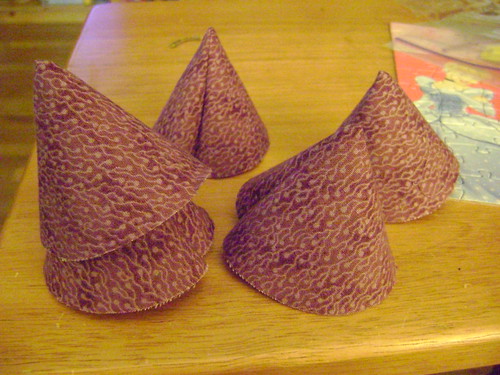
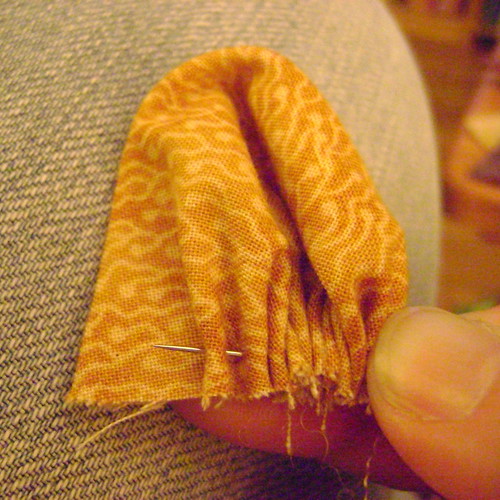
Flip right sides out and make a bunch of cute tents.
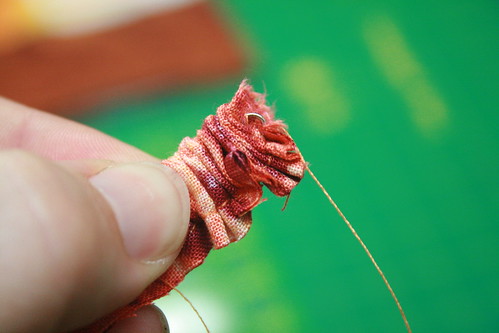
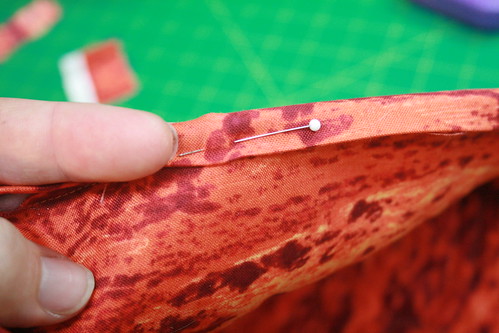
Fold Down the cone so that the seam falls in the back of the petal.
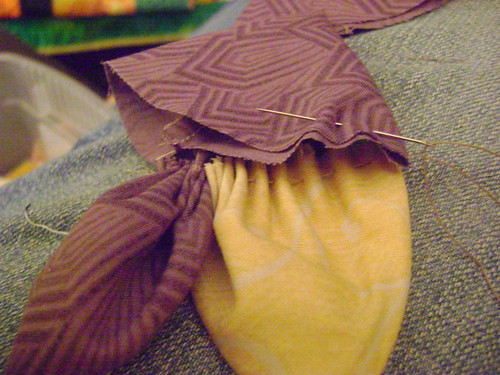
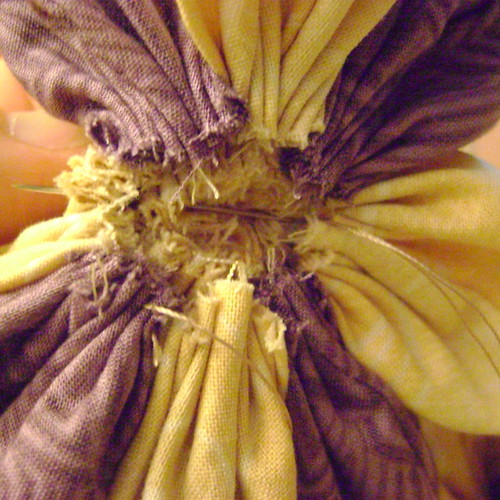
Using a strong thread, like upholstery or hand quilting thread, begin to gather the raw edge. The bottom may not line up perfectly, do not worry, just be sure to catch both layers.
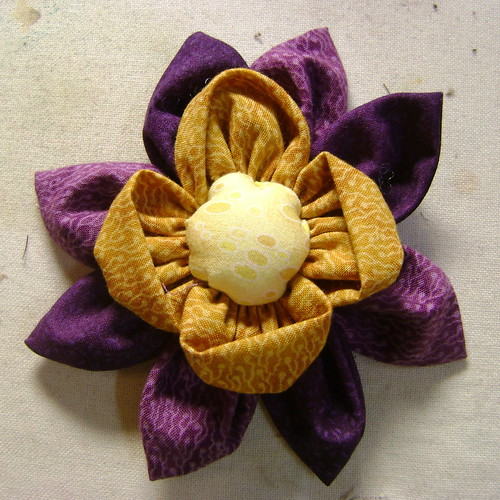
Sew 8 petals together. Form a circle by sewing the last petal to the first petal. Tighten up your gathered edge and take and extra stitch then tie of your first layer.
The second layer of petals uses the medium full circles.
Fold the circle in half WST and start gathering on the curved raw edge. Make sure to catch to top and bottom layer. Using the full circle makes a soft rounded petal. Sew four petals, sew the last one to the first one. Tie off BUT don't CUT your thread.
Place the smaller layer on to of the larger layer.
Stitch them together through the hole in the middle.
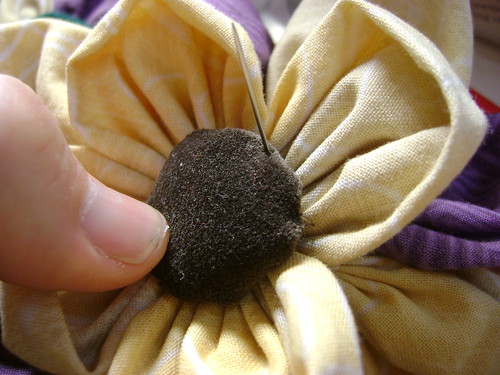
Center Stuffed yoyo.
Use the 2 inch circle. Sew around the entire circumference of the circle, place a small bit of poly fil and gather up your stitches. Tie it off but don't cut the thread.
Sew the plush yoyo down to the center front of the flower.
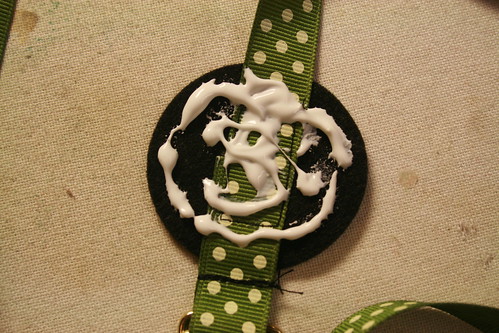
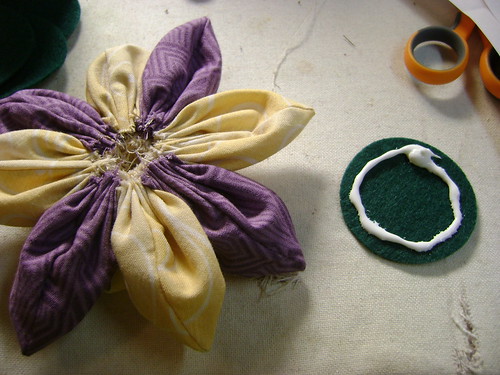
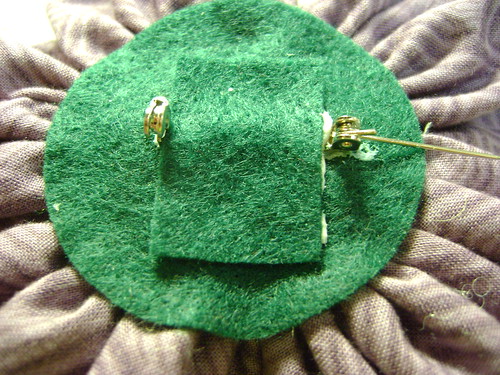
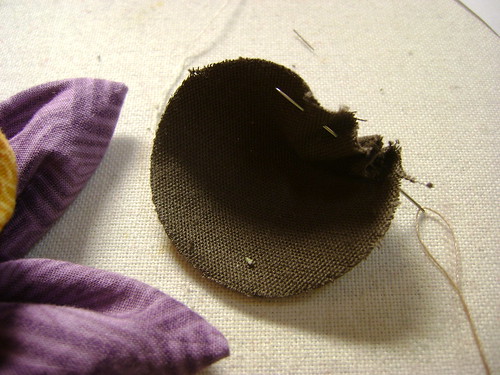
Using Super Thick Tacky Glue put a bead of glue on the green felt.
Place it on the back of the flower, thus hiding all the raw edges.
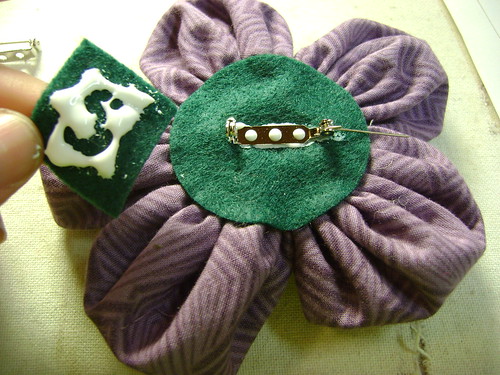
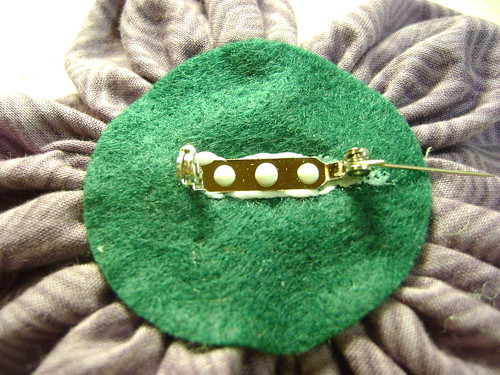
Glue down the pin back.
Cut a scrap of green felt the width of the inside of your pin back.
Glue the rectangle of green felt over the bar of your pin back
Hot glue could be used if you need instant pin backs, I prefer the Super Thick glue.
This option has a covered button in the center, I found those a bit of pain to put in, since you have to wait until the green felt circle on the back is dried. If you want to try a covered button we did a
tutorial on making covered buttons you might want to see.
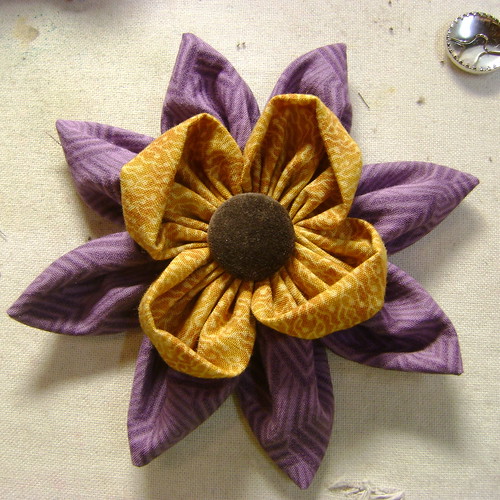
This example uses only full circles 5 large & 5 Medium, it is the sample for my students' MD project.
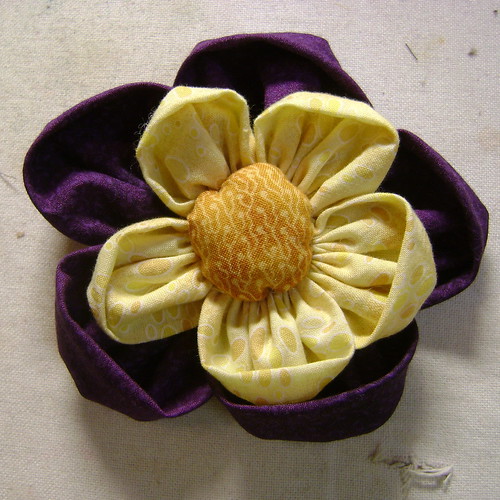
This example uses 5 large full circles and 5 medium half circles.
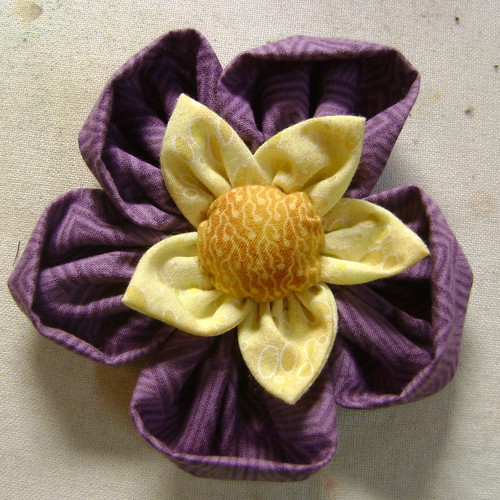
This is the tutorial flower with a yellow center.
Other ways to use your flowers:
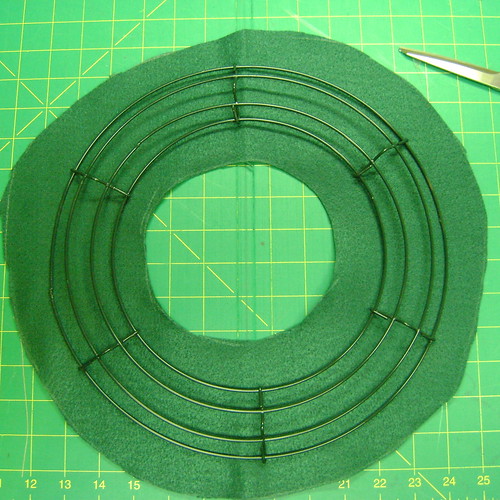
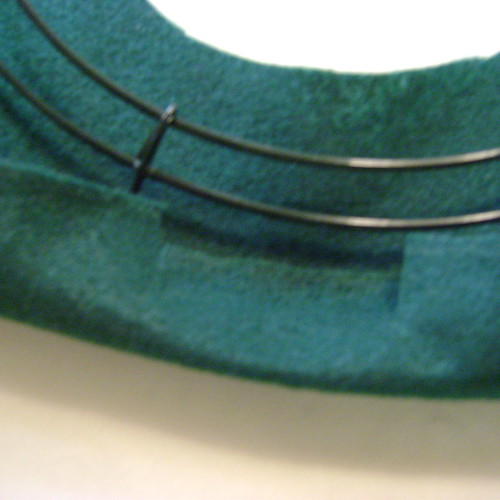
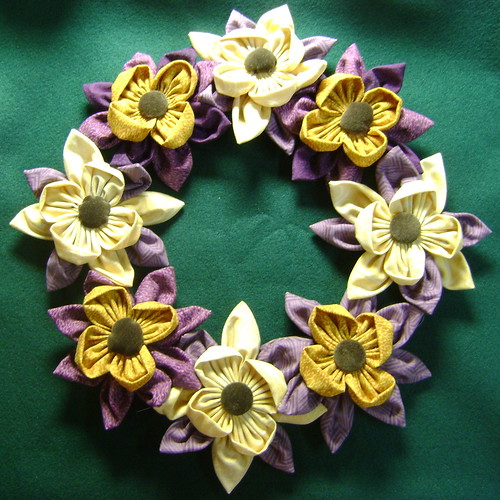
Use a wreath form and make a fabric flower wreath for the door.
Last year we made a wreathe of paper flowers that was a hit.
Attach a thick pony elastic to the the back (sew this in a I doubt the glue would hold)
Glue / sew it to a headband.
Sew it to a
Farmers Market Tote