Showing posts with label Tutorials. Show all posts

I love you(r DNA) quilt

Last night I taught a great group of ladies this quilt. I just updated the info. I will post new photos later today.

I just finished my second instructable for the great quilt I designed this weekend.


Saint Brigid Day February 1

One day Dubhthach takes his daughter in a chariot to the King of Leinster to see if he can strike a deal to make her a member of the King's court. Brigid is left outside in the chariot, and while there, a leper approaches her, seeking alms. Without hesitation, Brigid hands over her father's sword, an item of great value. In the warlike province of Leinster, this says more than words can capture about Brigid's system of values. Needless to say, these values do not correspond with her father's, and he is furious when he discovers her action. Fortunately for Brigid, the King of Leinster is present as Dubhthach begins to chastise her, and he checks Dubhthach rage, saying: "Leave her alone, for her merit before God is greater than ours." Thus Brigid returns home, and through this incident of being praised by the king is also delivered from bondage. In time, Dubhthach tries to arrange a marriage for his daughter (another way of making her someone else's responsibility), but she isn't interested. Beautiful Brigid consecrated herself to God at a young age, choosing a life of virginity, dedication to God and service to the poor.

Lego Bracelet Tutorial


Yes, I took another trip to the Hobby Lobby. I went for the first time before Christmas and now I am a bit hooked, they have tons!!! of great junk.

Remember my warning about not reinventing the wheel. Well this is a super fun wheel and a great project for little ish ones, (Choking Hazard) as long as Mom is in charge of the E 6000.

Egg Muffins, Yum!

Thought I would share our favorite breakfast with you! The girls love this and it is fast enough to happen on a school day, requires almost no prep and the leftovers are a hit for snack or another breakfast.


Ingredients:
Organic Free Range Eggs (we use the whole dozen)
Gluten Free Pre Cooked Sausage (We Like Wellshire Maple Pork) or Lunch Meat
Spray oil

Muffin Tin
Fork
Small Bowl, If you don't like eggs with visible yokes.

Prep:
  • Night Before: Pull the sausage out of the freezer and pop it in the fridge.
  • Morning of: If you are using lunch meat or want to add peppers or cheese dice it up into small chunks.


    • Set Oven to 350

Spray your muffin pan with a spray oil. This helps keep the eggs from sticking to the pan and make cleanup a breeze.


Crack one egg and deposit the egg into one muffin compartment (is there a better term for that?). I break the yoke with a folk. If you don't want the yoke to be so evident then crack the egg in a bowl and give it a good mix with the fork first (sometimes the eggs that are more mixed will stick a bit to the muffin pan). That is what I did on the bottom row of eggs.


Slice half of a sausage link in with each egg, gently press down so that the egg covers the link.

OR add whatever good stuff you like with eggs: peppers, cheese, salsa. Press gently into the egg.

Cook at 350˚for approx. 20 minutes. This is a personal decision. The girls like runny eggs so I will occasionally pull it from the oven after 15 minutes. If I know we are eating at home.

Serve up or if you are late for school tell them they can eat them in the car. After the egg muffins are cool, I put them in the fridge for another breakfast or snack.


Why do I love these so much!
  • The pan is usually easy to clean up, more so than my cast iron after making eggs.
  • I can walk away from the eggs once they are in the oven, which makes for a great breakfast that I don't have to hover over. 
  • It is already in serving sized bits. 
  • It is not messy to eat with your hands (if needed). 
  • The girls love it!
  • Oh, and it is a power packed protein meal that sticks a bit better than toast.

Castle Peep Quilt Kits & Summer Camp

For the Knoxville AQS show I made up the Castle Peep Quilt kit from Andover. It was a great hit and I have a few left in all of the colorways. The quilt kit shown in the pattern is in green, but there is also a red-orange-pink color way and a blue colorway. I made more of the green but sold more of the blue, go figure. It only takes about 30 minutes to make and looks super cute.

The kit includes all of the fabric for the 44 x 50 top and binding
  • 1/2 yard of 4874
  • 1/2 yard of 4871
  • 1/2 yard of 4872
  • 1/2 yard of 4875
  • 7/8 yard 4876
  • 1 5/8 yard 4373
I love the Lizzy House designs and this summer she is sponsoring a Castle Peeps Summer Camp with fun downloads and great ideas for her fabric. Run over and visit with her and then hop over to our shop and pick up your supplies so you can make some of the cool project she is sharing.

Kokeshi Make & Take from Melly

Late yesterday I received an email from a customer that put a huge grin on my face.

Hello ladies!

I stopped by your booth at the AQS show in Knoxville and picked up your embroidery special - 2 DMC thread colors and a hoop, then you get the linen with the pattern stamped on it.  so cute!  Of course I'm addicted to embroidery now! Finished that cute doll pattern, and have downloaded several more :)  My question for you is:  I loved the linen that your free pattern was printed/stamped on.  What is it called?  And do you stock it in your store?  And do you stock any more embroidery patterns?

Thanks ladies - for introducing me to hand embroidery!  What fun fun fun!


A Very Sunny Tea Cozy Tutorial

When I saw the NEW Hungry Caterpillar panel from Eric Carle & Andover, I knew I wanted to make my mom something with it.
Not actually with the caterpillar part, with the sun. Every time I look at it I hear the song, You are my Sunshine, which my mom used to sing to me when I was a child.

My mom loves hot tea and she needed a newr tea cozy, so here it goes.
Supplies:
One New Very Hungry Caterpillar Panel
1/2 yard of Cotton Batting or Pellon Thermolan
1/2 yard of lining fabric
Basic machine sewing supplies.


I cut the panel in half and measures my Fiesta tea pot, mom's teapot is a bit bigger,


I folded a large piece of brown paper in half to make the pattern.
To make the half circle I made a compass with a piece of twill and a pencil.
My pattern is approx. 16 x 10. It may be a bit large for most tea pots but I did not want to cut off too many for the sun rays.


Use the pattern to cut 2 each of liner, batting or Thermolan, and the front Sun panel.

Make a fabric sandwich.
Lay liner WS up then the batting or Thermolan, then the sunshine RS up.
Use your walking foot and or your free motion foot to quilt the three layers together. I used a combo of free motion quilting and straight line quilting. Sew around the outside edges.
The quilting is decorative so go wild. I outlined the sun rays and then did free motion inside the sun face.
For the small loop at the top.
Cut 2  x 6 inches of the liner fabric.
Fold in half WST
Sew 1/4 inch away from the fold.
Trim excess seam allowance down to 1/8 inch.

Use a safety pin to turn.
Trim to the stitch line.
Pin the skinny strap to the center top.
Baste in place.
Put the Sun sides together. Line up the ground. Sew 1/2 inch seam on the curved top.
Finish the inside seam.
Cut a strip 2.25 x WOF of the liner fabric.
Fold in half.
Iron
Sew the raw edge of the strip to the bottom  raw edge of the Sun side of the cozy 1/4 inch SA.
This is just like binding a quilt.
 Fold the strip over the raw edge and hand sew it down inside the cozy.

Turn it Sun side out and pop it on your favorite teapot.

Flower Book Belt


More fun with the fabric flowers. Here is the tutorial on how to make the flowers.

Supplies
Finished Fabric Flower
2 D rings
Black Felt circle 2 inches
Grosgrain Ribbon in a size that fit your D rinds
Super Thick Tacky Glue
Measure around your book with your ribbon add a few inches to be safe, you can cut it down later.
Slide the 2 D rings onto the end of the ribbon.
Fold over at approximately an inch.
Stitch Down the ribbon.
Sew the 2 inch Felt circle to the ribbon WST.
Smear on some Super Thick Tacky Glue.
Press the gluey felt circle to the existing felt circle on the finished back of your flower. Let it dry.
A Book Belt!
Look good at the pool with your very fashionably attired book!


Fabric Flowers For Mother's Day

What to do? What to make for the super mom in your life? I am not fond of dead flowers, more commonly known as cut flowers. It bothers me that they are chopped off at their prime and stuck in sugar water for my personal enjoyment. If you want to give me vegetation it should have some roots. So to that end, every year I purchase my mom & myself a new (old) antique rose. I usually visit our local nursey Hastings. If you are in the Metro Atlanta area and have never visited, it is a treat, my kids love it: turtles, fish, parrots and sometime even bunnies along with many hard to find plants. The antique roses are amazing and they thrive with no spraying or extra work. They make me smile for months instead of days. This year after they bloom I am going to try making some rose cutting and see if I can make more of my antiques roses to share.  I have successfully rooted only one rose and it was an important one. I took the cutting from the roadside of 515 near Blue Ridge during one of the many round trips I make 3 years ago during my mom's chemo. This rose has not bloomed yet but it has buds this years and I will share as soon as I have pictures.

Wow, What was this post supposed to be about? Fabric Flowers! Let me get back on topic!

So since I don't give cut flowers and fabric flowers last forever here is how to make some.

Pick out your favorite (or their favorite) colors. My MIL loves lavender / purple. Cut out some circles.
For each flower you will need
4 large (5.5 inches) 
4 medium (4 inches) circles,
1 small (2 inches) circle Brown or Yellow Fabric,
1 small (2 inches) circle Green Felt.
Thread, Glue and a Pin back.
Cut the large (5.5 inch) circles in half. Making 8 half circles.
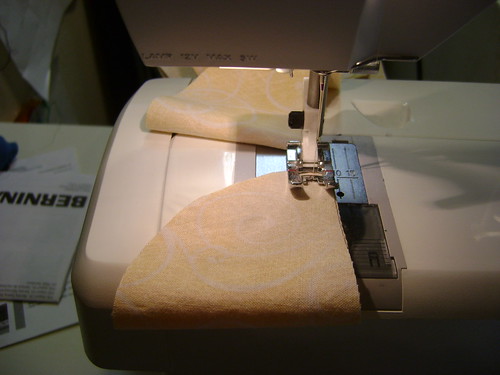
Fold the half circles into quarter circles RST and stitch down the straight edge (1/8 inch seam allowance). Snip apart.

 Flip right sides out and make a bunch of cute tents.
 Fold Down the cone so that the seam falls in the back of the petal.
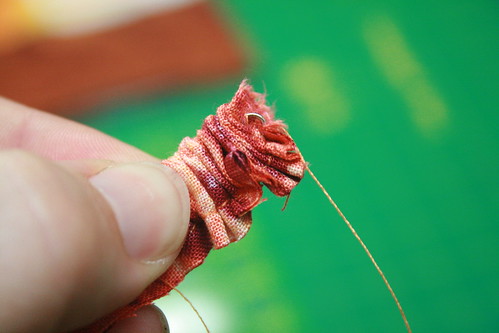
Using a strong thread, like upholstery or hand quilting thread, begin to gather the raw edge. The bottom may not line up perfectly, do not worry, just be sure to catch both layers.
Sew 8 petals together. Form a circle by sewing the last petal to the first petal. Tighten up your gathered edge and take and extra stitch then tie of your first layer.
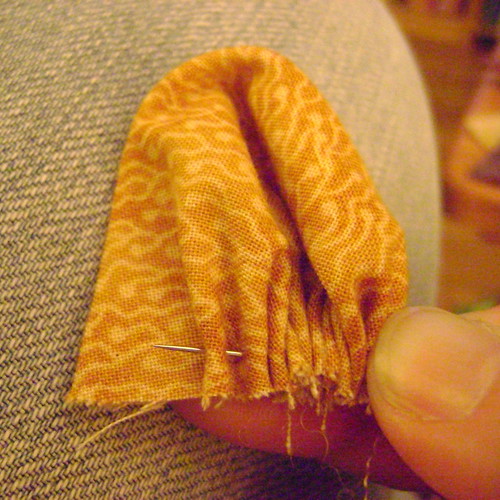
 The second layer of petals uses the medium full circles.
Fold the circle in half WST and start gathering on the curved raw edge. Make sure to catch to top and bottom layer. Using the full circle makes a soft rounded petal. Sew four petals, sew the last one to the first one. Tie off BUT don't CUT your thread.

Place the smaller layer on to of the larger layer.
Stitch them together through the hole in the middle.
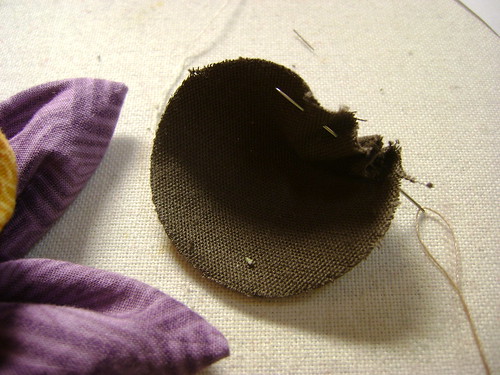

 Center Stuffed yoyo.
Use the 2 inch circle. Sew around the entire circumference of the circle, place a small bit of poly fil and gather up your stitches. Tie it off but don't cut the thread.
Sew the plush yoyo down to the center front of the flower.
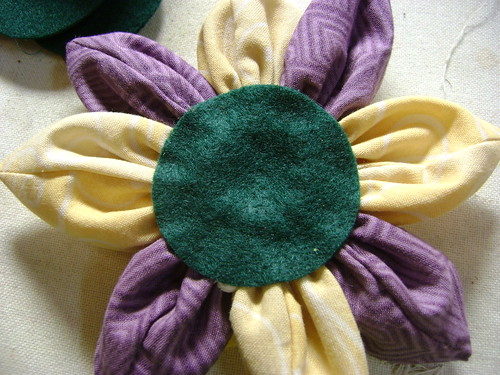
Using Super Thick Tacky Glue put a bead of glue on the green felt.
 Place it on the back of the flower, thus hiding all the raw edges.


Glue down the pin back.

Cut a scrap of green felt the width of the inside of your pin back.
Glue the rectangle of green felt over the bar of your pin back

Hot glue could be used if you need instant pin backs, I prefer the Super Thick glue.

 This option has a covered button in the center, I found those a bit of pain to put in, since you have to wait until the green felt circle on the back is dried.  If you want to try a covered button we did a tutorial on making covered buttons you might want to see.
This example uses only full circles 5 large & 5 Medium, it is the sample for my students' MD project.
This example uses 5 large full circles and 5 medium half circles.

This is the tutorial flower with a yellow center.
Other ways to use your flowers:
Use a wreath form and make a fabric flower wreath for the door. Last year we made a wreathe of paper flowers that was a hit.
Attach a thick pony elastic to the the back (sew this in a I doubt the glue would hold)
Glue / sew it to a headband.
Sew it to a Farmers Market Tote

LinkWithin

Related Posts with Thumbnails