
Got right on this tutorial since Dollar Store Crafts stash busting event wraps up on my husband's birthday, I mean Earth Day.
1/2 inch Seam Allowance.
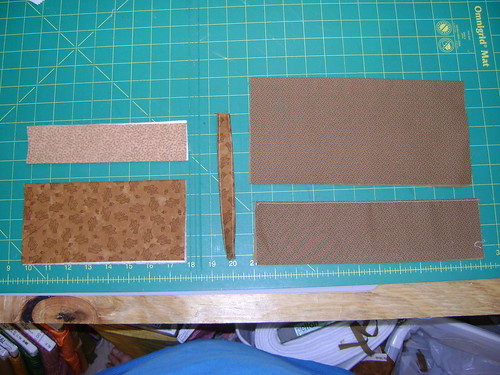
Supplies Needed
Scraps of cotton fabric
7 inch zipper
Split ring
Pellon Fusible Fleece

Front top
4 x 8 Cotton
2 x 8 Fusible Fleece
Front Bottom
8 x 8 Cotton
4 x 8 Fusible Fleece
Middle Divider (optional)
11.5 x 8 Cotton
Back
12 x 11.5 (or 2 pieces 6 x 11.5) Cotton
No Fleece in back.
Strap
3 x 8 Cotton
Fold the top & bottom front pieces over the fleece and press.
Fold the Middle divider in half (4 x 11.5), press & top stitch.
Fold the 12 x 11.5 in half (6 x 11.5), if you cut two pieces just lay them out WST.
For Strap fold in the raw edges, press and top stitch both long sides of strap (.75 x 8).

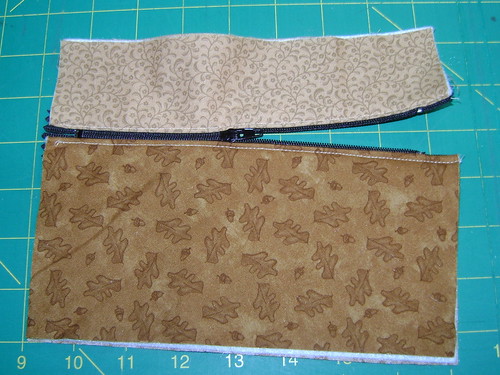
Place the finished edge of the bottom front piece up right next to the zipper teeth. The zipper tape should be 8 inches long just like your front piece. Slowly sew down the edge of the fabric about 1/8 inch away from the zipper teeth.
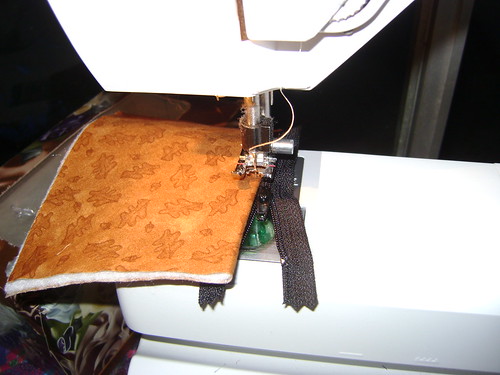
AS you get close to the zipper pull, put your needle in the down position.
Lift the presser foot.

Lower the presser foot and continue to the edge of the fabric & zipper tape.
Line up the finished edge of the top front piece with the other side of the zipper and repeat.
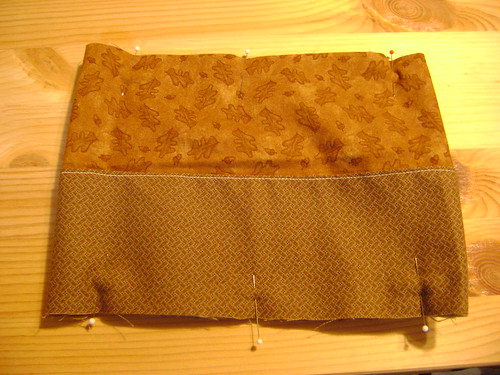
Lay the front piece with finished zipper down first.

Layer the folded back piece or the 2 6 x 11.5 back pieces, ALIGN to one of the short sides.
add the folded divider align to the same short side and to the bottom.
THE BACK PIECES ARE LONGER THAN THE FRONT.
Sew the sides with the zipper side UP!!! Sew one of the short sides. Watch out for the metal ends of the zipper. You should miss them, but move past them slowly cause they will snap your needle right off.
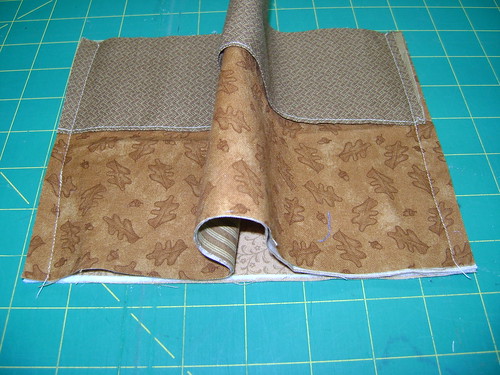 There will be a bump in the back fabric.
Look, the edges of the back poke out and you can see them from the front.
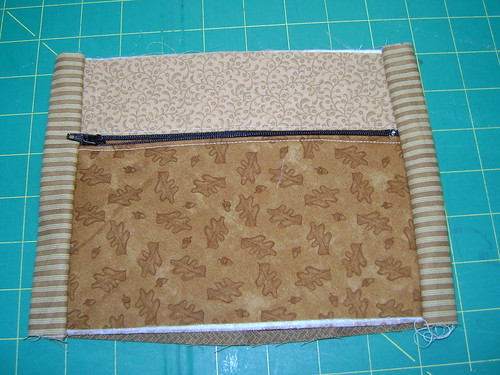 If you were to flip it to sneak a peak, this is what it would look like . BUT don't do it cause you will just have to flip it back to finish it up.
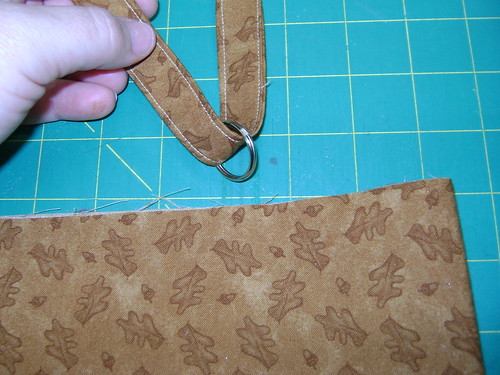 Put the strap into the split ring then slide into the sandwich, pin to the front top on the same side as the zipper pull when the zipper is closed.
 Pin the top and the bottom. This is a view from the back.
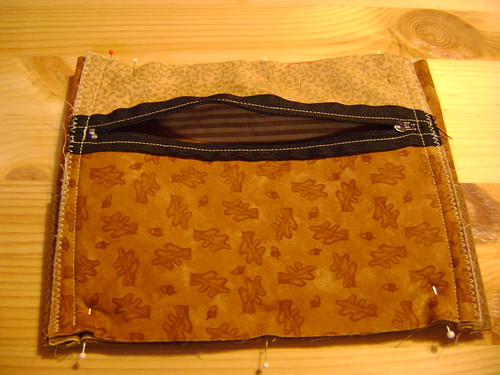 Here is view of the front.
  Sew the top and bottom egde. Finish the seams.
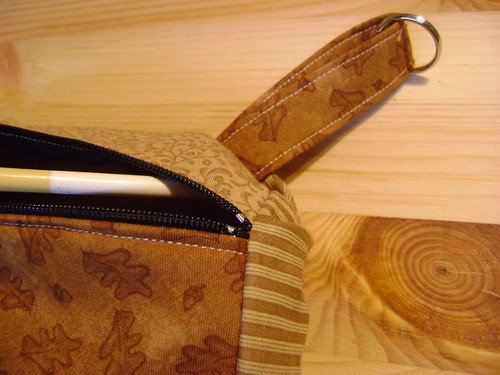 Turn right side out. Poke out the corner.
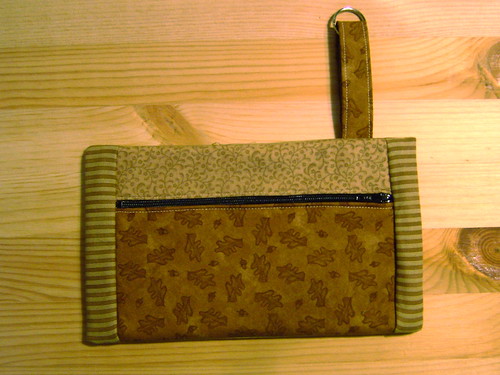
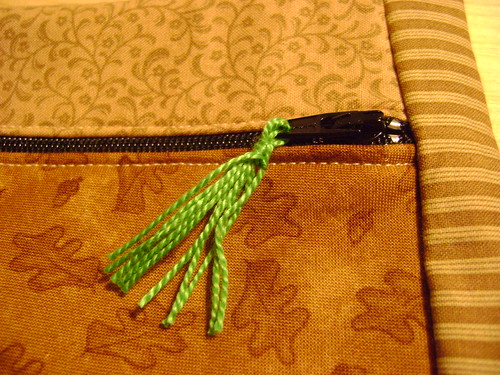 I added a few strands of dmc floss to make a zipper tassel.
All Done.
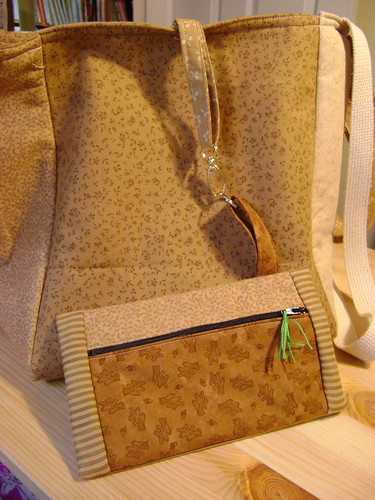
In retrospect: for my next tote and wallet I will make the wallet first and then attach it to the top edge with 2 straps from the top of the wallet, while I construct the overall tote. I will not need the ring and clasp. OR if I really want to have the wallet removable I will shorten the straps, cause as it is now constructed the wallet will drop into the bottom of the bag and perhaps end up under my veggies.
5 comments:
Love your wallet!! I linked to your tutorial on Craft Gossip Sewing:
http://sewing.craftgossip.com/tutorial-stashbustin-zippered-wallet/2010/04/20/
--Anne
Thank you so much for sharing! It's really nifty. You could add a long strap (that can be tucked into the wallet when not in use) so you could wear the wallet too.
Adding a longer strap is a great idea. I really like the way this is constructed. I used the same method of the wrap around back in the travel tissue tutorial. I think this wallet has great potential. I washed a bunch of batiks from my stash last night. Maybe my FM friends will be getting new bags soon.
Great tutorial! I like projects that use up those odds 'n' ends.
Cindy
sidetrackedartist.blogspot.com
Wow! Thank you for this fantastic tutorial!
Post a Comment