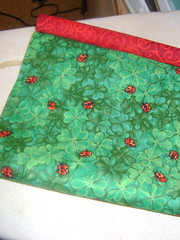
What, you may ask, is a fabric shop owner doing participating in such an non buying event?
WELL, I am an extremely talented hunter and gatherer of wonderful fabrics. I am there, I love fabric. Now I own a shop full of it, BUT what do I do with all the great fabrics that are languishing unused in my sewing room. Well, one thing for sure, I can't use them for shop samples, I did that ONCE and I finally took it down after explaining over 100 times that NO we did not have that fabric. So this month will be about sewing for me, my family and maybe for craft shows next November & December.
These 10 inch square were swapped from all over the world, but until yesterday they were sitting in a container on a shelf, forgotten, unloved, with out hope of ever being sewn into a useful and beautiful object.
On to the tutorial:
TRAVEL TISSUE Cover:
I started this tutorial about a week ago by searching for other folks' tutorials, there are a bunch out there. After reading a few of them I found I needed to change them, so here is my version of how to make this super simple gift.
Cut out 2 fabrics:
Outside cover 6 x 7
Lining 6 x 8
All Seam 1/4 inch
All Seam 1/4 inch
Place fabric RST.
Using a 1/4 seam allowance. Sew one short side.
Line up the other short side, sew.
Then flip the tube right sides out.
There will be approx 1/2 inch of the liner fabric showing in the front of your cover.
Press one side so that no liner shows.
Press the other side with 1/2 inch of liner showing.
The two pieces of fabric should now be flat.
Optional, top stitch the exposed lining fabric.

BIG CHANGE from other TUTs
When I made my first couple I butted the two finisheded edges up. I did not like this, they were gappy and you could see the tissue inside, which meant that the tissues would get dirty! YUCK!
MY WAY:
OVERLAP the front of the travel case, thus hiding the tissue, keeping it clean and safe.
Fold over the finished edge with the exposed liner first.
Then fold over the plain finished edge. Stick a pin in it.
Rotate it to the other end and do it again.
Rotate it to the other end and do it again.
Tricky Tricky
Now for the hanger. If I don't attach a hook or a loop of some sort, everything ends up in the bottom of my purse, never to be seen again.
I used a 2 inch piece of twill tape (but you could use a scrap of the fabric from the cover) and a split ring. One of the dud examples I used a very nice Clover snap thingy, but I decided if I was going to sell these that the hook would make them too expensive (I think they retail @ 2.95). Plus in my stash I have loads of split rings.
Loop the Twill tape into the split ring.
Slide the twill tape and the ring into the top end (top is only important if the fabric is directional).
Make sure you are sliding the ring between the two layers of the COVER fabric and NOT between the liner and the cover.
Make sure the ring is in far enough so that you will not hit it with your sewing machine foot.
Make sure the ring is in far enough so that you will not hit it with your sewing machine foot.
Put a pin in the tape so it stays put.
Sew both short ends.
Optional: Finish the raw edges with a zig zag stitch.
Turn right sides out and you are done.
Unless you are me, then you make 20+ more
Maybe I am done now, but I doubt it cause I barely made a dent in the pile of fabric.


3 comments:
Oh, I really like the overlap idea!! I've made a few the other way but your idea is much better and neater!
Thanks for Sharing.
I was just going through my stash last night and found a bunch of cut fabric I was going to make hot pads with and now I have a use for all those cuts. I love your overlap idea. Thanks
thanks for sharing...i was just searching and comparing various tutorials and used yours to make a little 'just because' gift for my son's teachers :) i agree with the need for the overlap! (and i like that the contrast fabric shows) i also like the addition of the ring tag...from another tutorial i decided to box the corners and that worked out really well...and i decided to use pinking shears on the edges-i hope that works out for me :)
Post a Comment